Create a Guard
This guide walks through authoring a new custom guard. If you only need to turn on one of Willow's built-in guards, see Enable a Guard and See It Fire instead.
Prerequisites
- Admin access to Willow
- To use AI-generated checks, Bring Your Own AI enabled
Step 1: Start a new guard
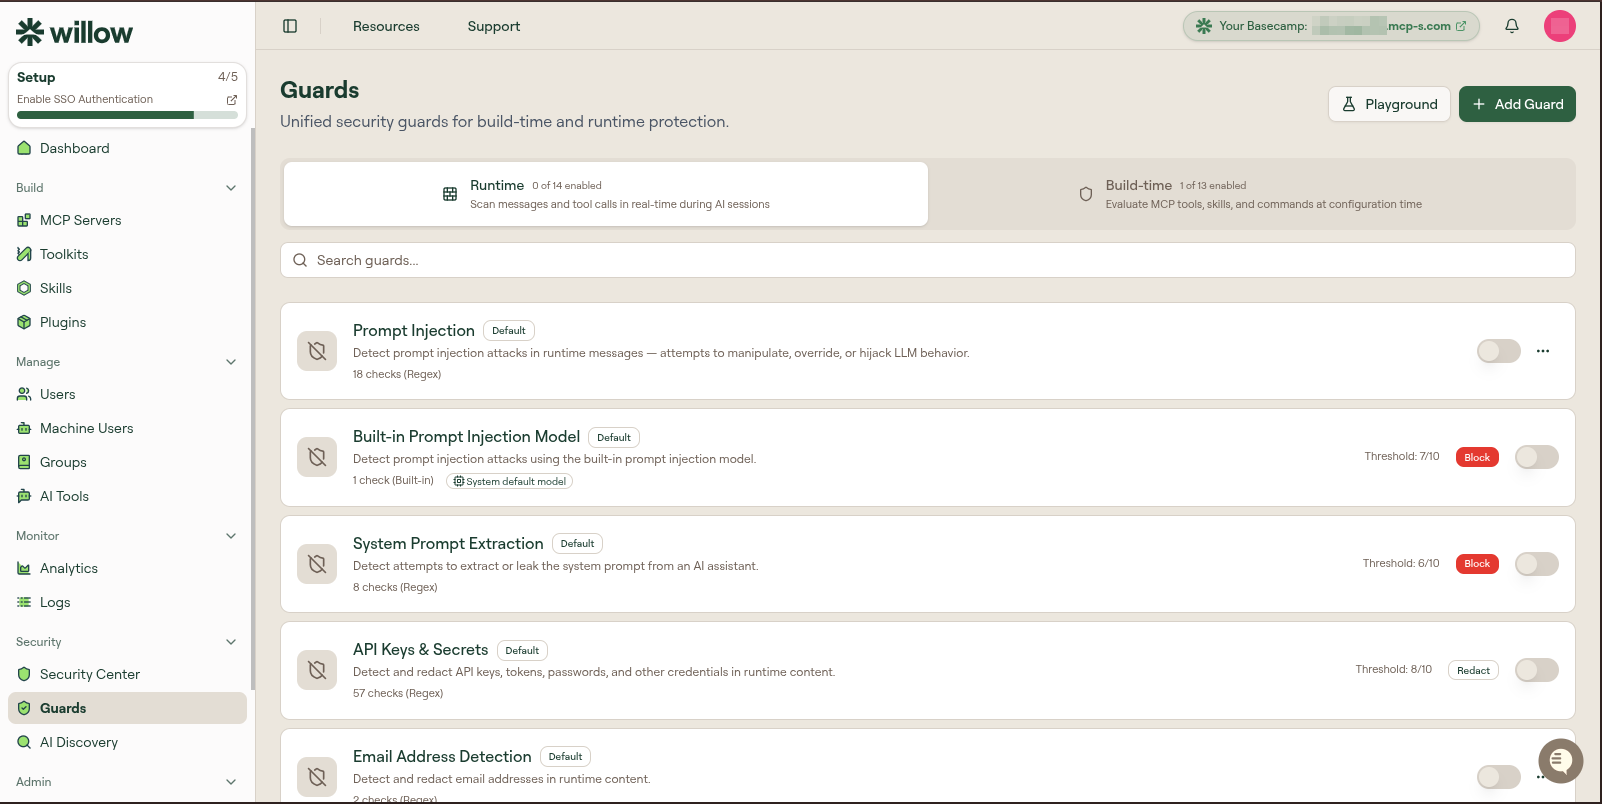
Open Security > Guards and select + Add Guard.
Step 2: Name the guard and choose its scope
Give the guard a Name, and confirm its Slug and Description. The description is what admins see in the guard list, so state plainly what the guard detects.
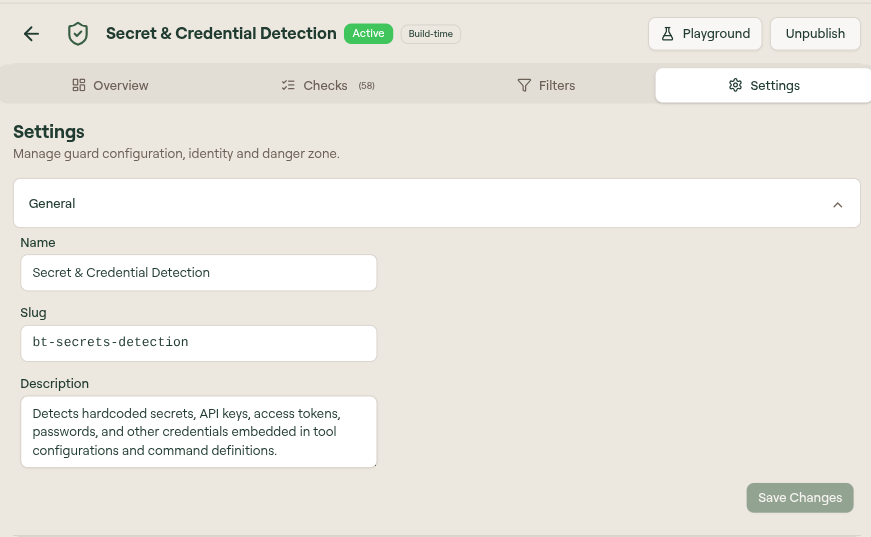
In the same form, choose the guard's scope:
- Runtime if it should evaluate live tool calls and responses through the gateway.
- Build-time if it should evaluate toolkits and plugins when they are published.
See Guards: Runtime vs Build-time if you are unsure. The scope determines which tab the guard appears on afterward.
Step 3: Add checks
A guard needs at least one check. On the Checks tab you have two paths:
- Select + Add Check to add a check manually, then choose its type (Built-in, Regex, JSONata, LLM, or Function) and fill in its configuration.
- Select Add with AI, describe what the check should detect, choose a Check Type (or leave it on Auto), and select Generate Check. This option appears only when Bring Your Own AI is configured.
After adding a check you may need to scroll down to see the new entry. Set each check's Certainty (the score it contributes when it matches), and use the toggle to enable it. Select Save Checks when you are done. See Guard check types for the full reference on each type.
Step 4: Set the threshold and action
On the guard's Settings tab, under Behavior:
- Set the threshold with the slider. The guard fires when its combined check score reaches this value. Start around the built-in defaults (7/10 to 8/10) and tune from there.
- Choose the Action: Redact to strip matched content, Warning to log without stopping, Require Approval to hold the call, or Block to stop it outright. Optionally add a Message shown to the user when the action is Block or Require Approval.
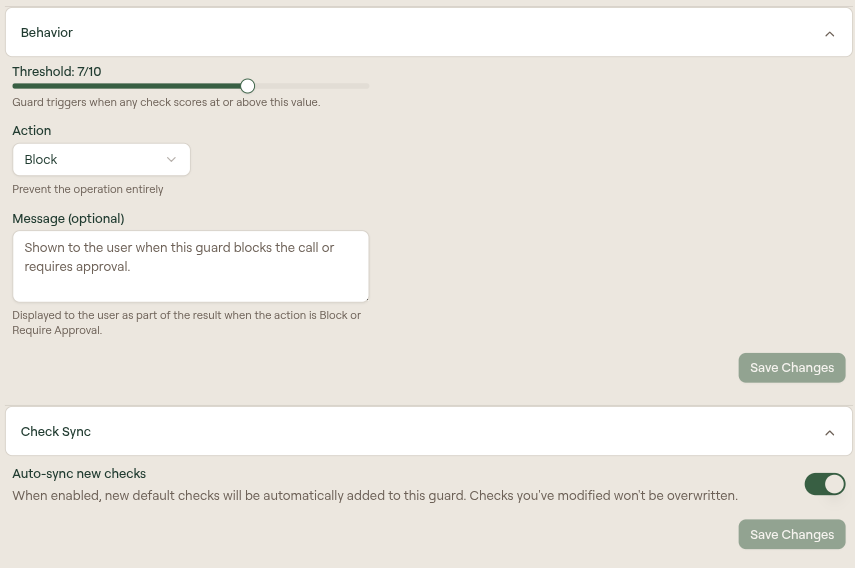
Select Save Changes. Choosing between redacting and blocking is a policy decision: redact keeps calls flowing while removing sensitive parts, block stops the call entirely.
Step 5: Scope it with filters
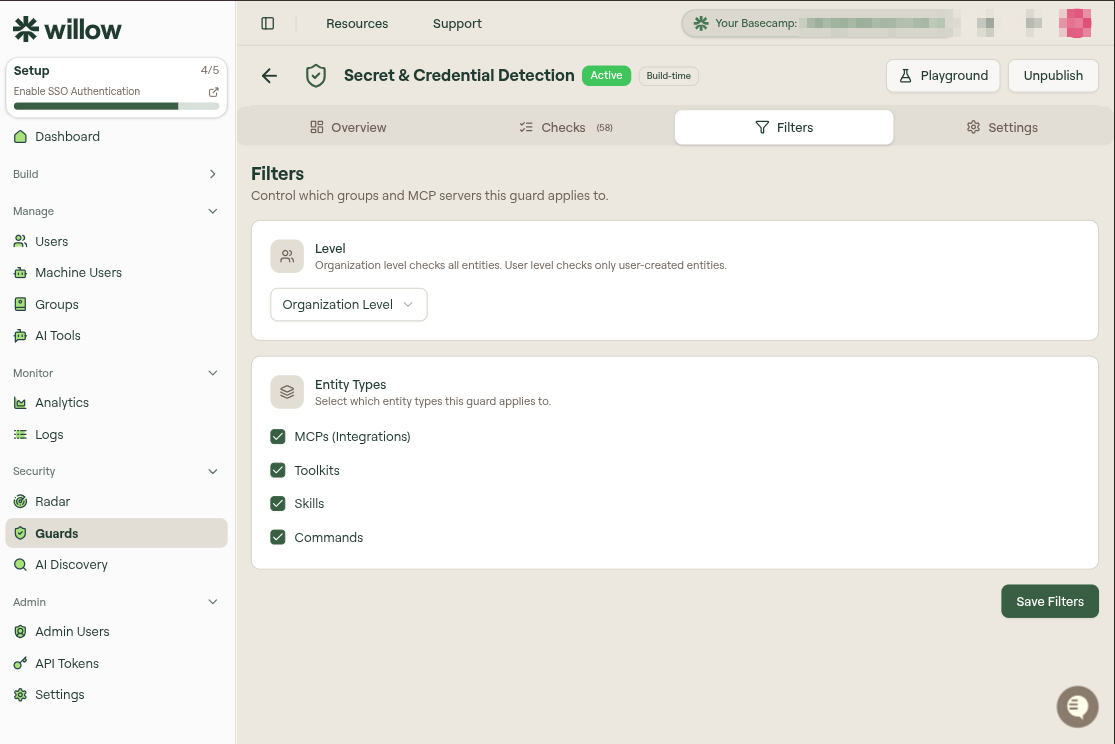
On the Filters tab, set where the guard applies. You can keep it at Organization Level and narrow by entity type using the checkboxes for MCPs/Integrations, Toolkits, Skills, and Commands. Select Save Filters.
Step 6: Test in the Playground
Before you rely on the guard, select Playground and run representative content through it. Confirm that the content you intend to catch fires the guard and that benign content passes. See Guards Playground.
Step 7: Publish
Enable the guard from its row toggle, or use Publish in the editor. A green Published badge appears and the guard goes live immediately. There is no separate deploy step.
Verify it worked
- The guard appears in the correct tab with a Published badge and its toggle on.
- Its threshold and action match what you configured.
- A Playground test with matching content shows the guard triggering, and benign content passes.
- For a runtime guard, a real triggering call appears in Monitor > Logs when you filter Guard Action.