Enable a Guard and See It Fire
This tutorial takes you from no active guards to a confirmed guard decision in Logs. You will enable one of Willow's built-in runtime guards, make a tool call that triggers it, and use the advanced log filters to confirm the guard intercepted the call.
By the end, you will have:
- enabled a built-in runtime guard
- set the guard action to Block
- made a tool call that the guard intercepts
- confirmed the guard event in Monitor > Logs using the Guard Action filter
Prerequisites
You need:
- admin access to Willow
- an AI client connected through the Willow gateway
- at least one active MCP server with at least one tool that accepts text input
If you have not connected an AI client yet, complete Set Up Willow for the First Time before continuing.
Step 1: Open Guards
In the admin dashboard, open Security > Guards.
The Guards page has two tabs: Runtime and Build-time. Runtime guards scan messages and tool calls in real time during AI sessions. Build-time guards evaluate MCP tools, skills, and commands at configuration time.
This tutorial uses a runtime guard.
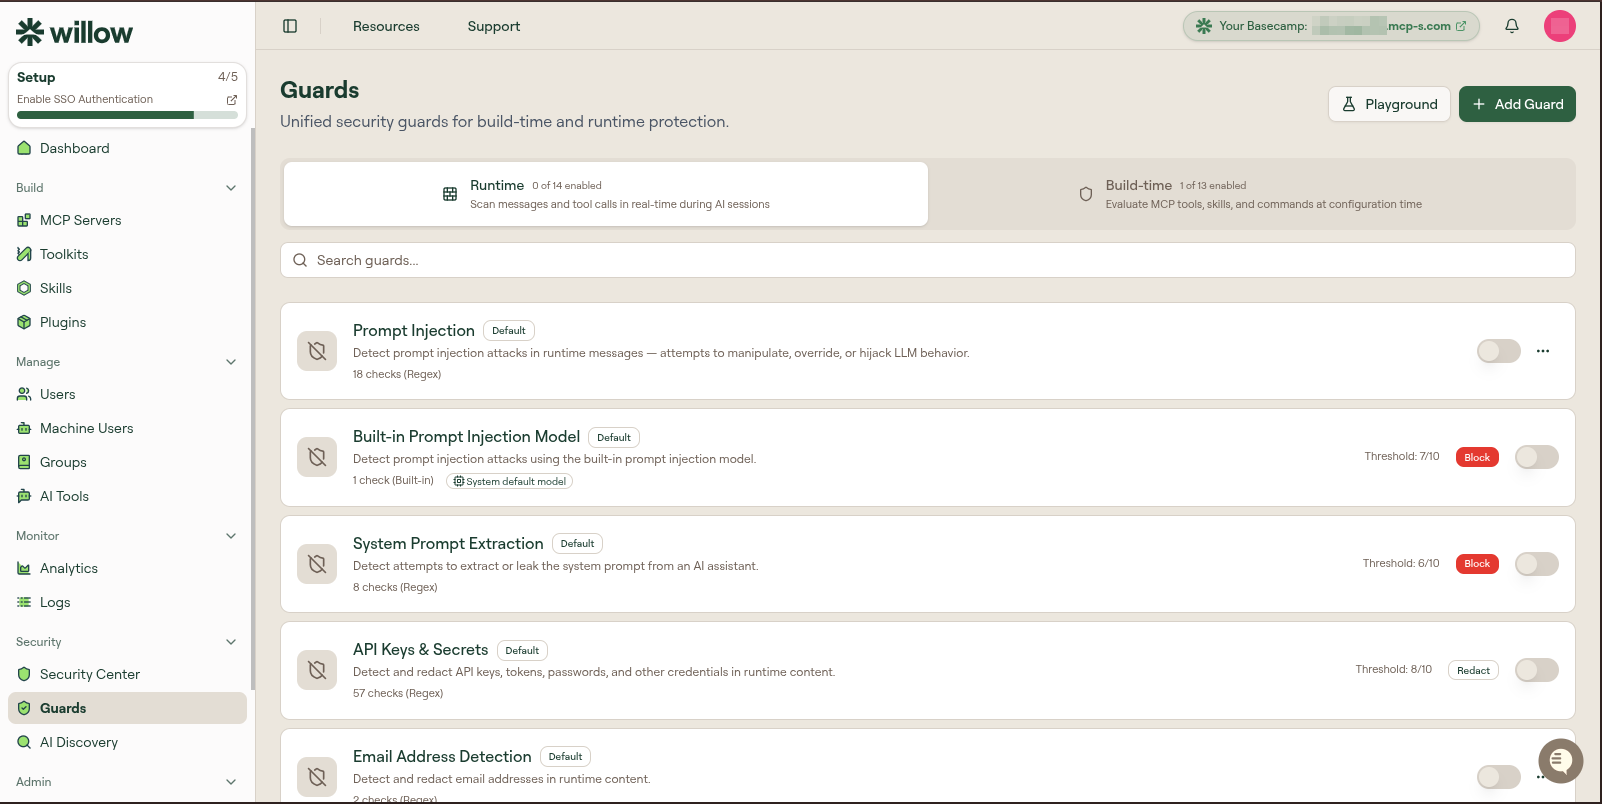
The Runtime tab lists all built-in guards. Each row shows the guard name, description, check count, threshold, action, and an enable toggle. All guards are off by default.
Step 2: Enable a guard
Locate Email Address Detection in the Runtime list. It detects and redacts email addresses in runtime content using two regex checks, with a default threshold of 8/10.
Toggle the switch on the right side of the row.

A green Published badge appears next to the guard name. The guard is immediately live. There is no separate publish step. Every tool call that passes through the gateway is now evaluated by this guard.
Step 3: Switch the action to Block
With the guard enabled, the action control on the guard row becomes interactive. Email Address Detection defaults to Redact, which replaces detected email addresses with a placeholder. For this tutorial, switch it to Block so the guard produces an unmistakable result: blocked calls fail completely and are easy to identify in logs.
Open the action dropdown on the Email Address Detection row and select Block.
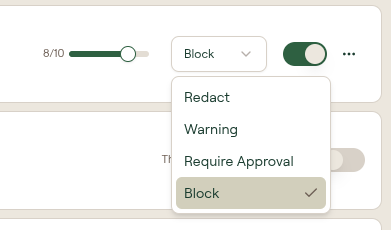
The action label on the row updates to show Block.
The threshold slider controls sensitivity. At 8/10, the guard fires when the combined check score reaches 8 or higher. For regex-based checks like Email Address Detection, any message containing a recognizable email address format scores 10/10 and triggers the guard. Leave the threshold at its default.
Step 4: Trigger the guard
In your AI client, make a tool call where an argument includes an email address.
For example, ask your AI assistant to search for information about test@example.com, or pass an email address as a text argument to any tool available in your workspace. The guard evaluates the content of the tool call payload, not the surrounding conversation, so the email address must appear inside an argument the tool receives.
When Email Address Detection finds an email address format in the payload and the score meets the threshold, the Block action fires. Your AI client will receive an error indicating the tool call was blocked.

If the call succeeds without being blocked, check that the email address is inside the actual tool argument, not only in the prompt text.
Step 5: Find the guard event in Logs
In the admin dashboard, open Monitor > Logs.
Select Advanced Filters to expand the filter panel. Open the Guard Action dropdown and select Blocked.
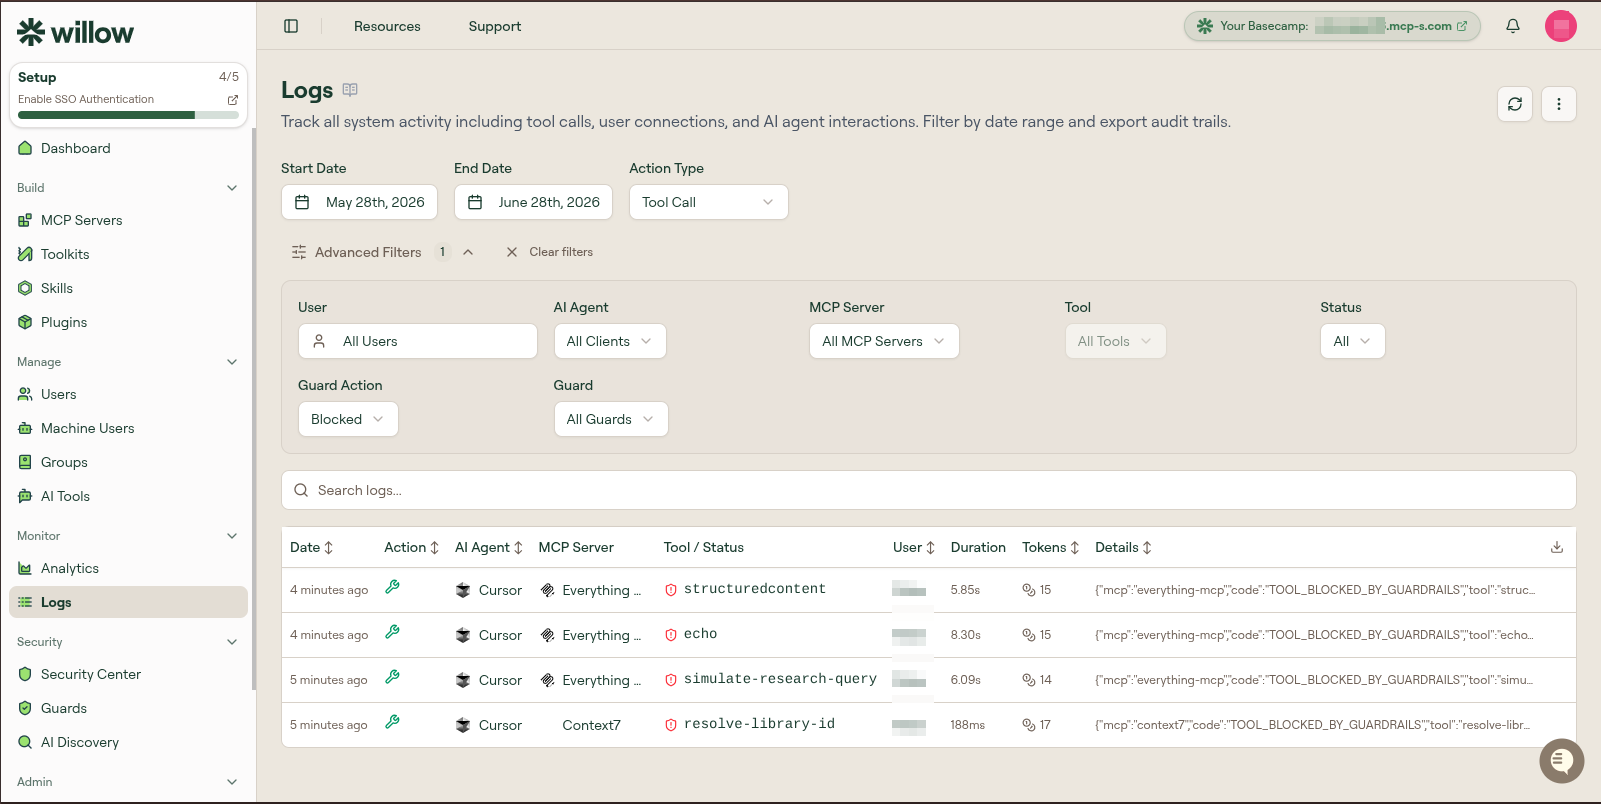
The log table updates to show only entries where a guard fired and blocked a call. Find the entry for the tool call you made. It shows the AI client, MCP server, tool name, user, and blocked status.
To narrow the results further, open the Guard dropdown and select Email Address Detection. This filters to events from that guard specifically.
Verify it worked
You are done when all of these are true:
- Email Address Detection appears in the Runtime list with a Published badge and the toggle on
- the action label on the guard row shows Block
- a tool call you made with an email address in the argument failed in your AI client
- the blocked call appears in Monitor > Logs when you filter Guard Action to Blocked