Add and Configure Your First MCP Server
This tutorial takes you from an MCP server idea to a configured server that has tools synced and is ready to grant to a group.
By the end, you will have:
- added an MCP server to your organization
- chosen between a catalog connector and a custom MCP configuration
- configured the server's authentication mode
- verified that Willow discovered tools
- tested one low-risk tool
- assigned an owner
- connected the server to a group
Prerequisites
You need:
- admin access to Willow
- a deployed Willow MCP gateway
- one MCP server or integration you can safely test with
- any credentials required by that MCP server, such as OAuth client details or an API key
- a group you can use for testing, such as Admins
For your first MCP server, choose something low-risk with at least one read-only tool. The goal is to prove that Willow can connect, sync tools, and enforce access before you add production systems.
Step 1: Open MCP Servers
In the admin dashboard, open Build > MCP Servers.
The MCP Servers page lists the servers already configured for your organization. The table shows each server's auth state, transport, content, connected groups, owners, updated time, and status.
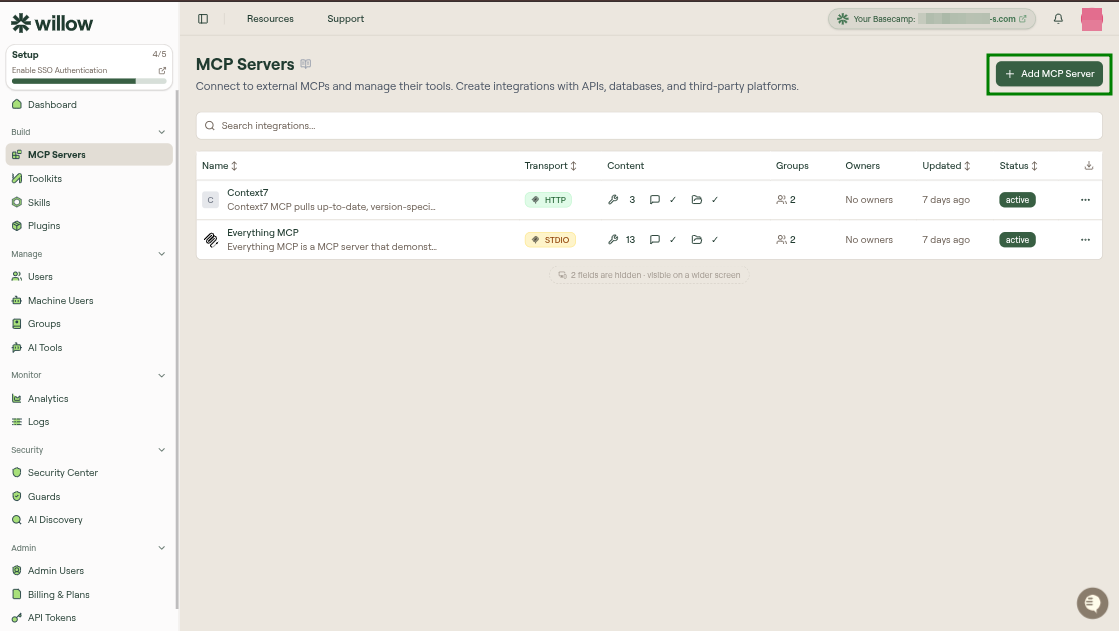
Select Add MCP Server.
Step 2: Create the MCP server
The Add MCP Server page lets you browse connectors and community MCP servers, or create your own custom configuration. Use search and filters to narrow the grid by connector source, category, auth type, transport, or open-source status.
From here, choose one of two paths.
Add a catalog connector
Use this path when Willow already shows the MCP server you want.
- Search for the connector, such as
GitHuborSlack. - Hover over the connector card.
- Select Use.
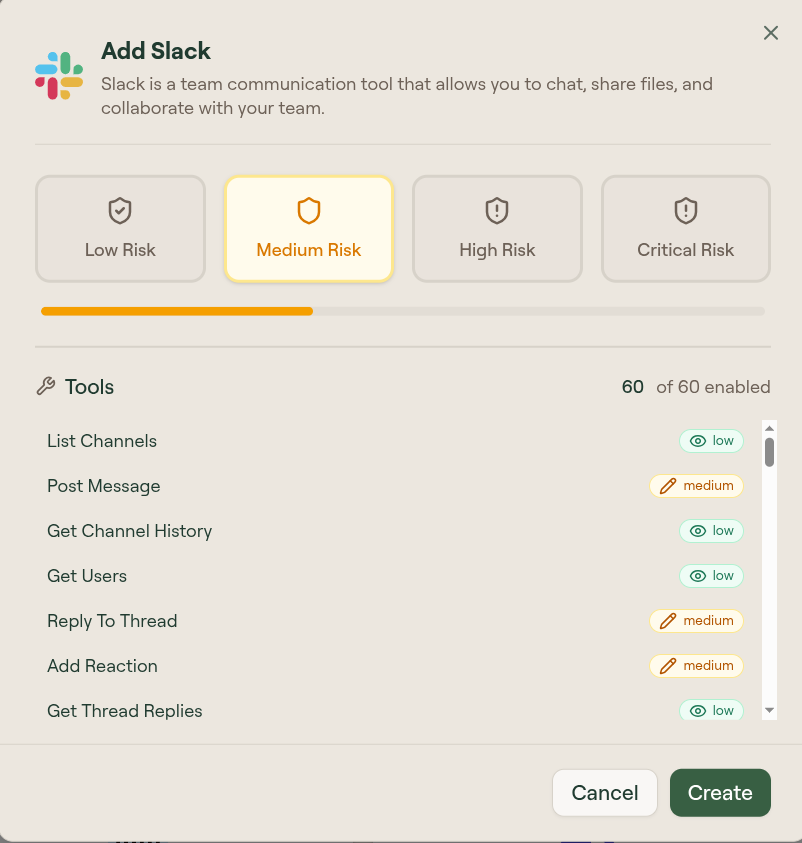
- Review the add modal.
- Check the risk level and the tool list.
- Select Create.
The add modal shows risk bands and the tools Willow will enable for that connector.
Create a custom MCP
Use this path when you already have an MCP server endpoint or local command.
- Hover over Custom MCP.
- Select Configure.
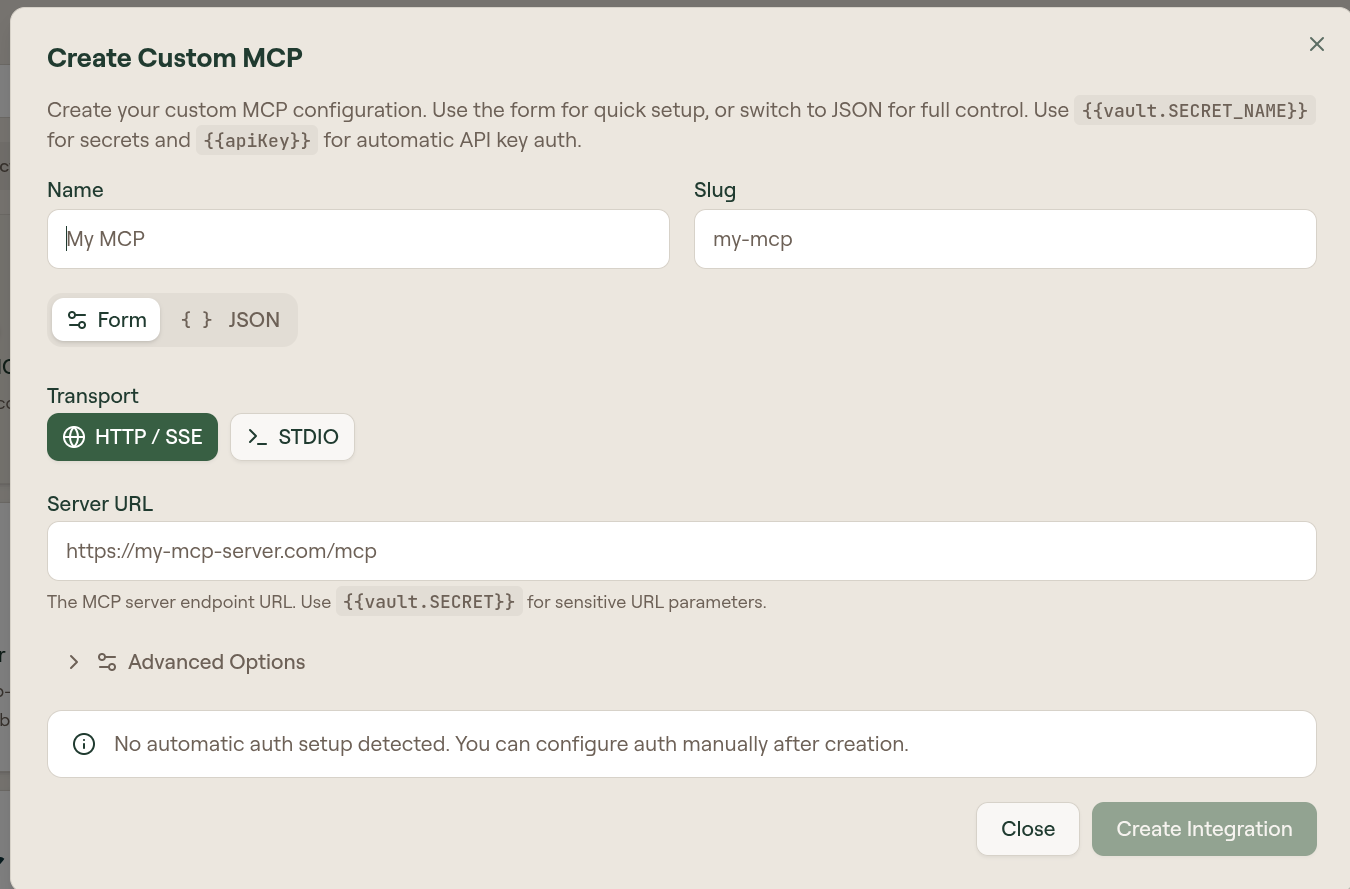
- Enter a Name and Slug.
- Choose Form for guided setup, or JSON for full configuration control.
- Select the transport:
- HTTP / SSE: enter the server URL.
- STDIO: enter the command and arguments.
- Configure authentication if the server needs it.
- Select Create Integration.
The form mode is the fastest path for common HTTP/SSE or STDIO setups.
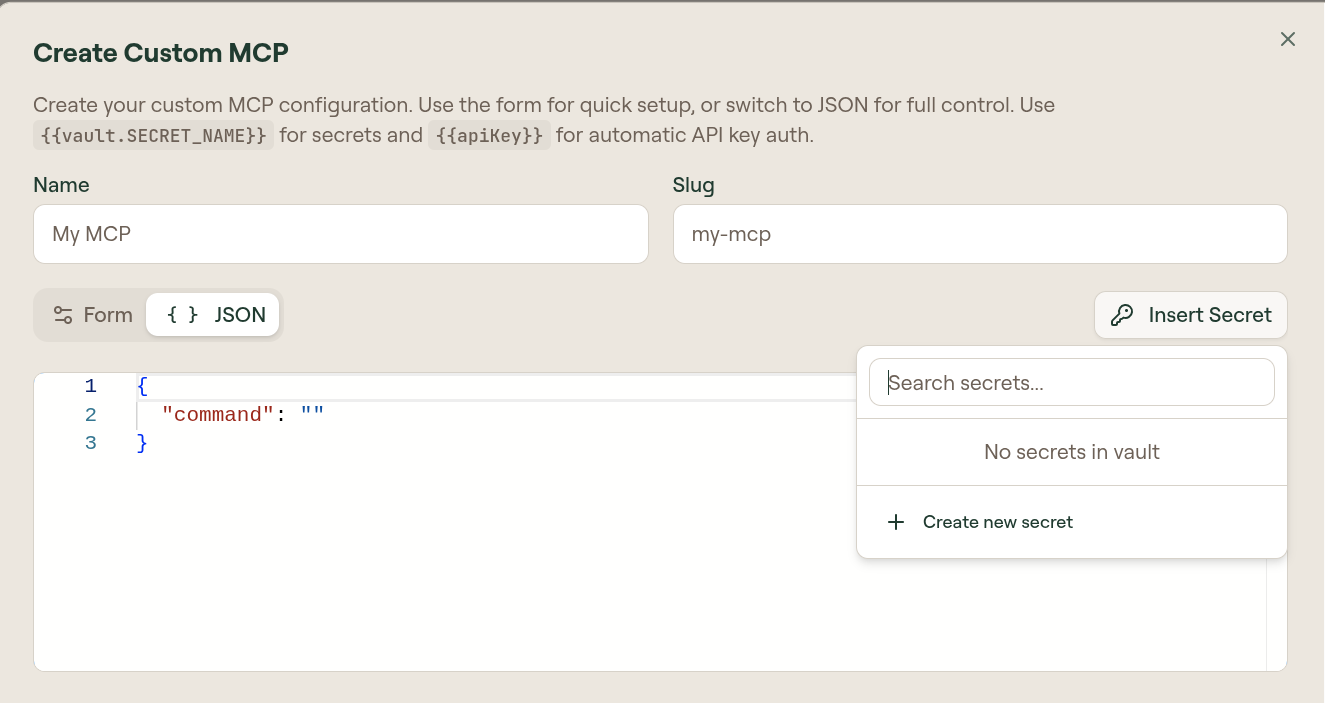
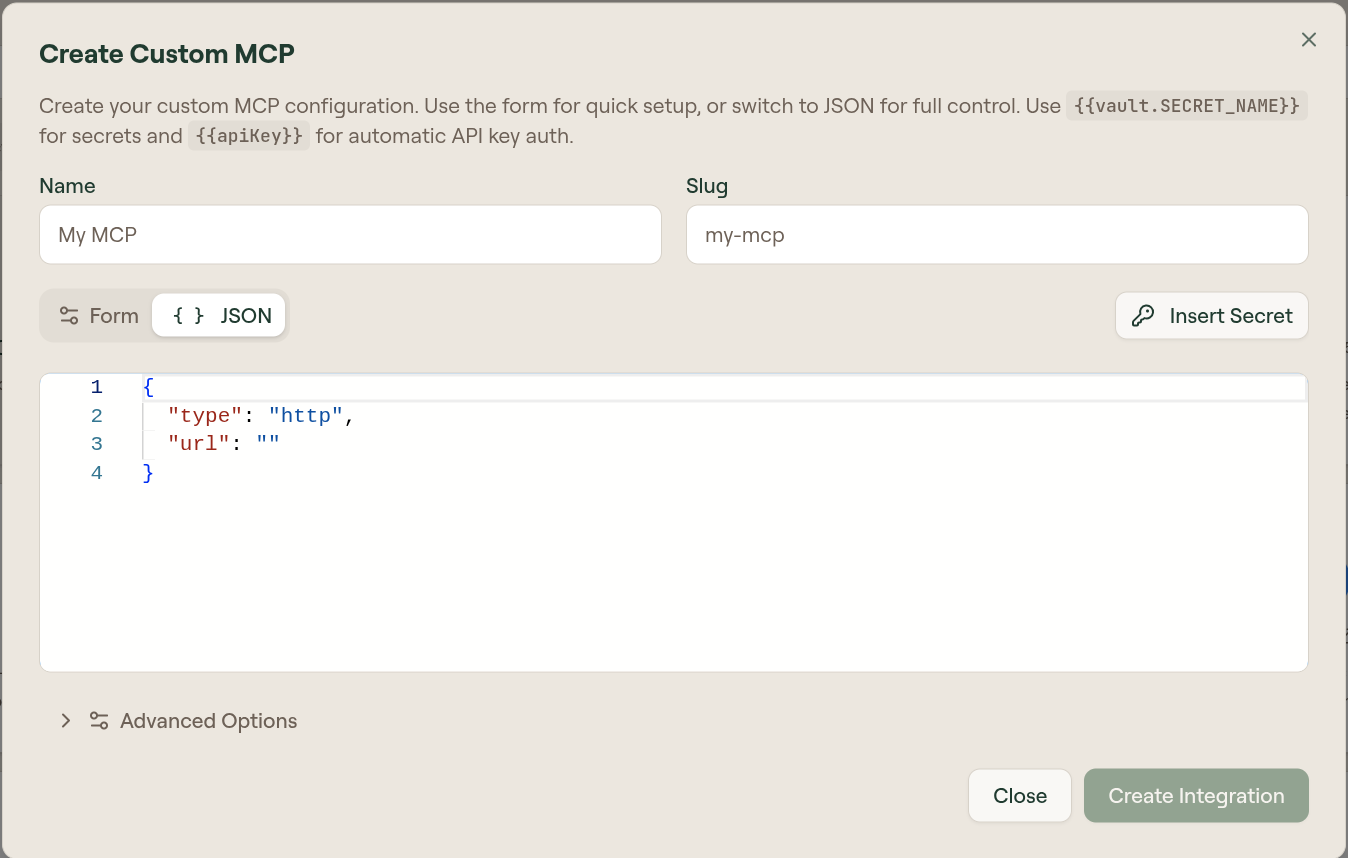
The JSON mode gives full control over the MCP configuration and supports inserting vault secrets.
Custom MCP supports these authentication options under Advanced Options:
- OAuth: provide OAuth client details for servers that use OAuth.
- API Key: add a static
Authorizationheader or let each user provide their own API key through the{{apiKey}}placeholder. - Proxy Passthrough: pass each user's incoming
Authorizationheader through to the MCP server.
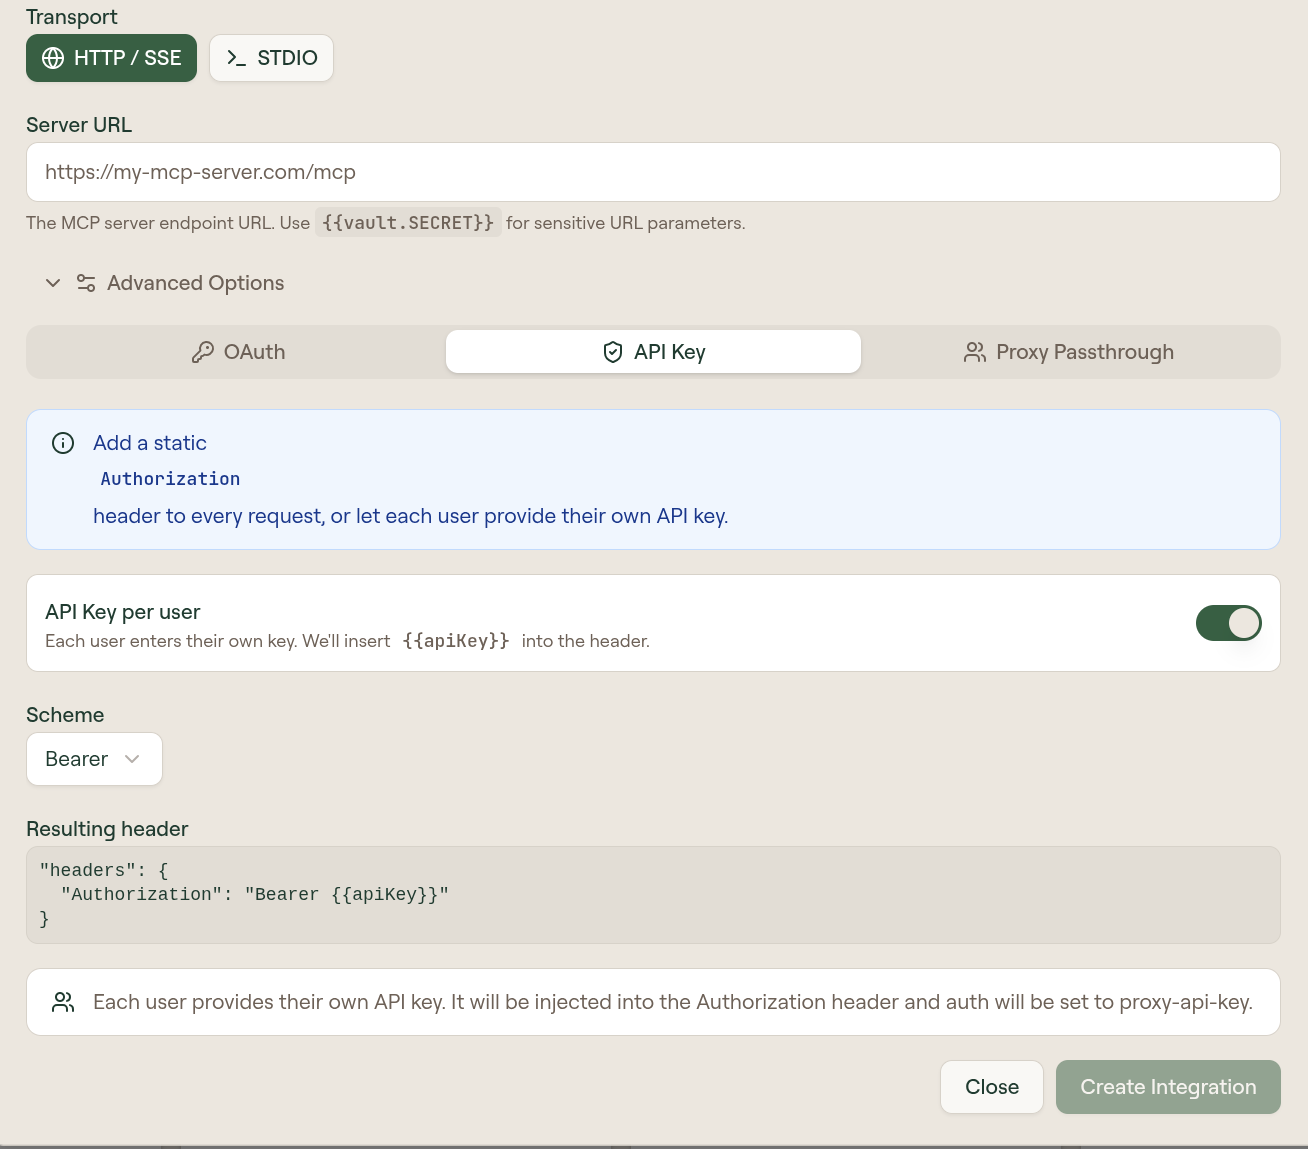
Use {{vault.SECRET_NAME}} for secrets and {{apiKey}} when each user should provide their own API key.
When creation finishes, the server opens in the MCP server edit page. In the captured product state, new MCP servers appear as draft until they are published.
Before continuing, take a moment to orient yourself on the edit page:
- Overview: summary, discovered tools, connected groups, active guards, recent activity, and the publish action.
- Setup: authentication and connector-specific setup.
- Tools: discovered tools, enablement, sync, risk assessment, test actions, and per-tool actions.
- Resources: resources exposed by the MCP server, if resources are enabled.
- Prompts: prompts exposed by the MCP server, if prompts are enabled.
- Settings: general details, owners, MCP configuration, proxy capabilities, request settings, metadata, and delete controls.
For the first setup path, you will use Setup, Tools, Resources, Prompts, Overview, and Settings. Resources and prompts may be empty for your first server, but you should still check their status so you know what the server exposes.
Step 3: Configure authentication
Open the MCP server you just created, then open the Setup tab.
The Setup tab controls how Willow authenticates to the upstream MCP server or how end users provide credentials. Choose the mode that matches the server:
- Proxy OAuth: Willow proxies an OAuth flow through your server. Use this when the MCP server supports OAuth and users should authorize access.
- Proxy API Key: end users provide their own keys. Use this when each user needs a separate credential.
- Proxy Passthrough: Willow passes the SSO provider ID token as the
Authorizationheader. - None: use this only for servers that do not require authentication.
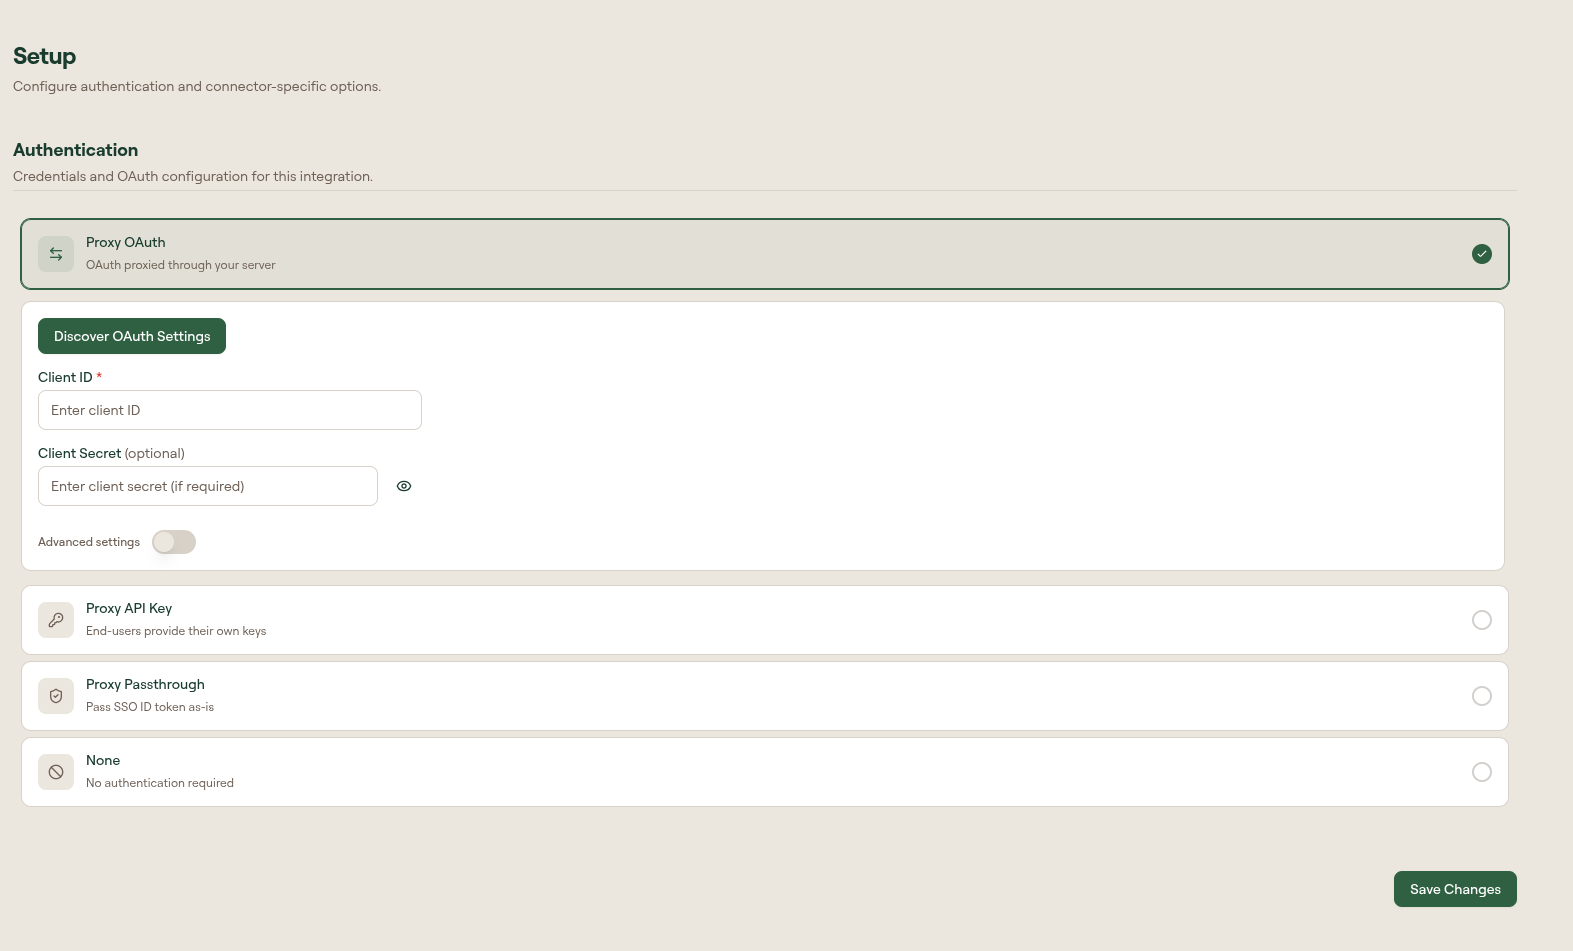
Fill in the required fields for the mode you chose, then select Save Changes.
If you are not sure which mode to use, start from the server's documentation. Do not choose None just to get through setup; the first test should match how the server will be used in production.
Step 4: Sync and verify tools
Open the Tools tab.
Willow lists the tools discovered from the MCP server. The page includes search, Sync Tools, Re-assess Risk, Enable All, and Disable All actions.
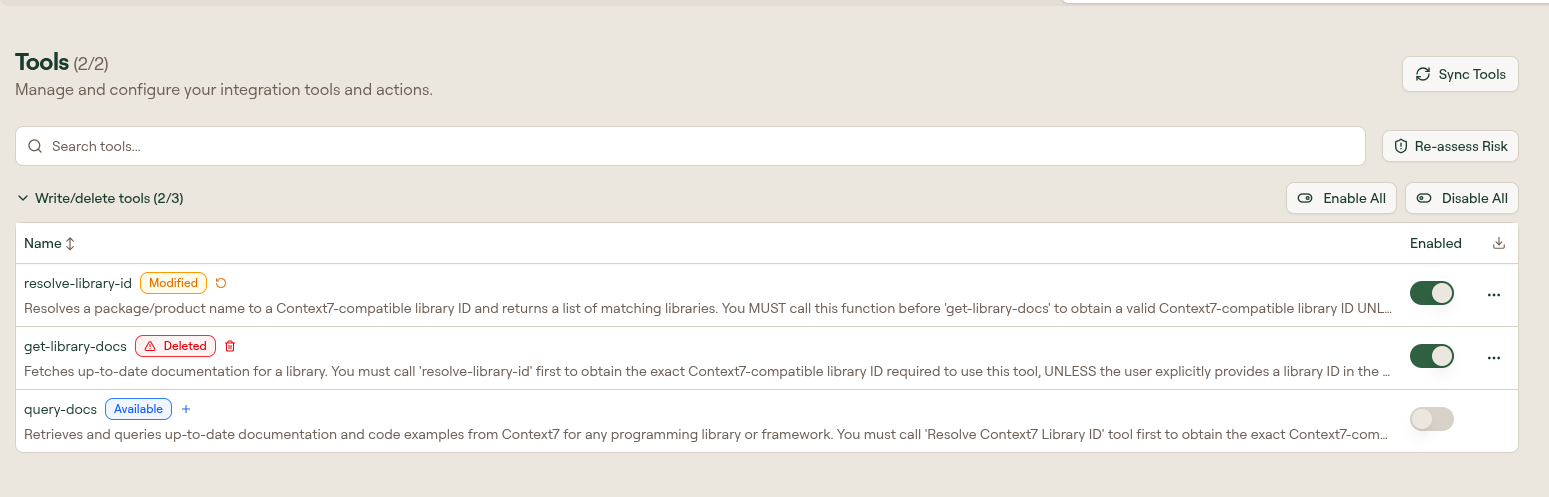
Select Sync Tools if tools are missing or stale. Then confirm that at least one expected tool appears and is enabled.
For a first test, keep the enabled tool set small. Disable destructive or write-heavy tools until you have confirmed access, logging, and guard behavior with a low-risk call.
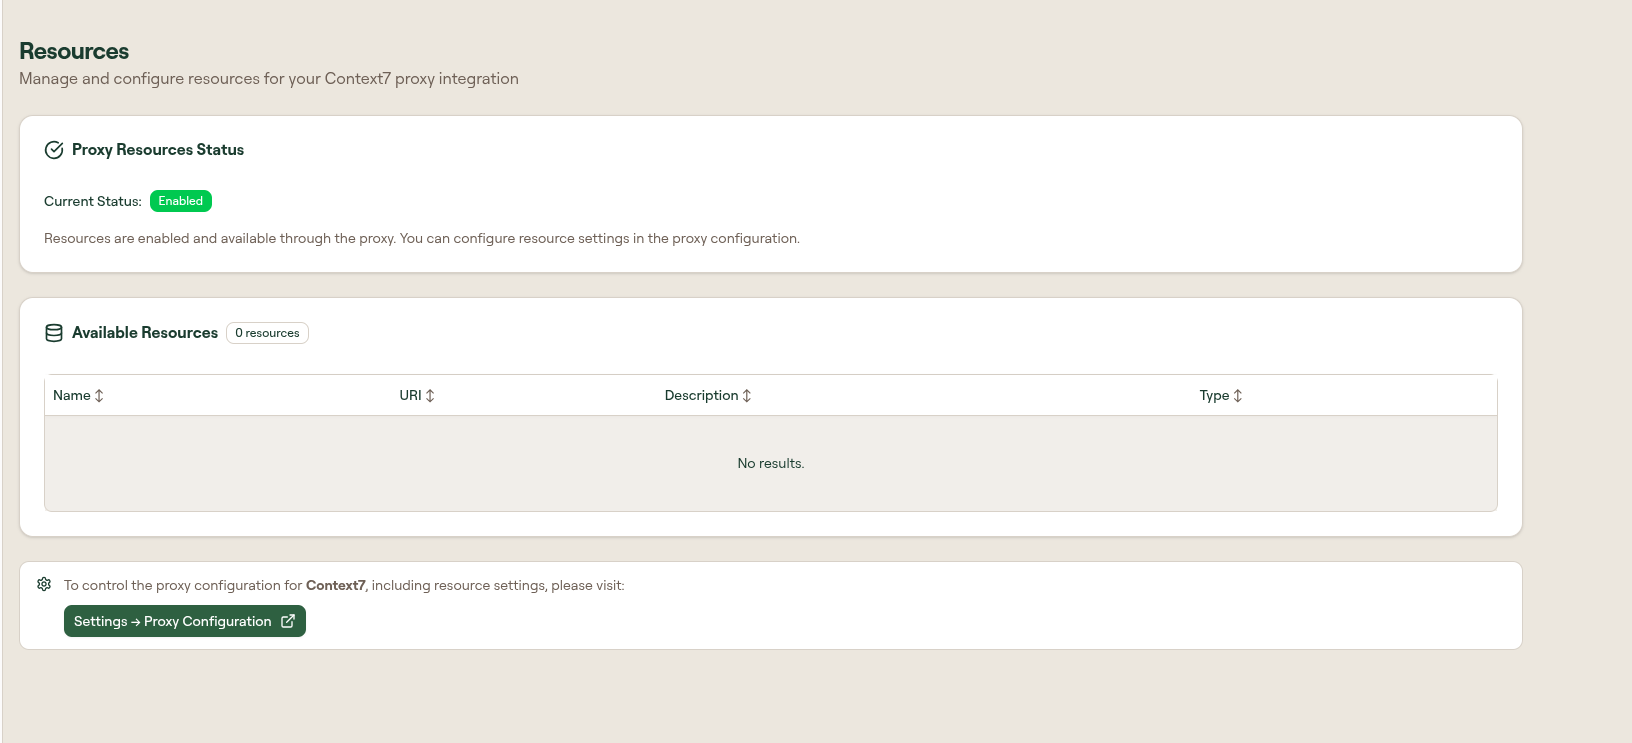
Step 5: Check resources and prompts
Open the Resources tab.
This tab shows whether resources are enabled for the proxy integration and lists any resources the MCP server exposes. If resources are enabled but the table is empty, the server did not expose any resources in the captured state.
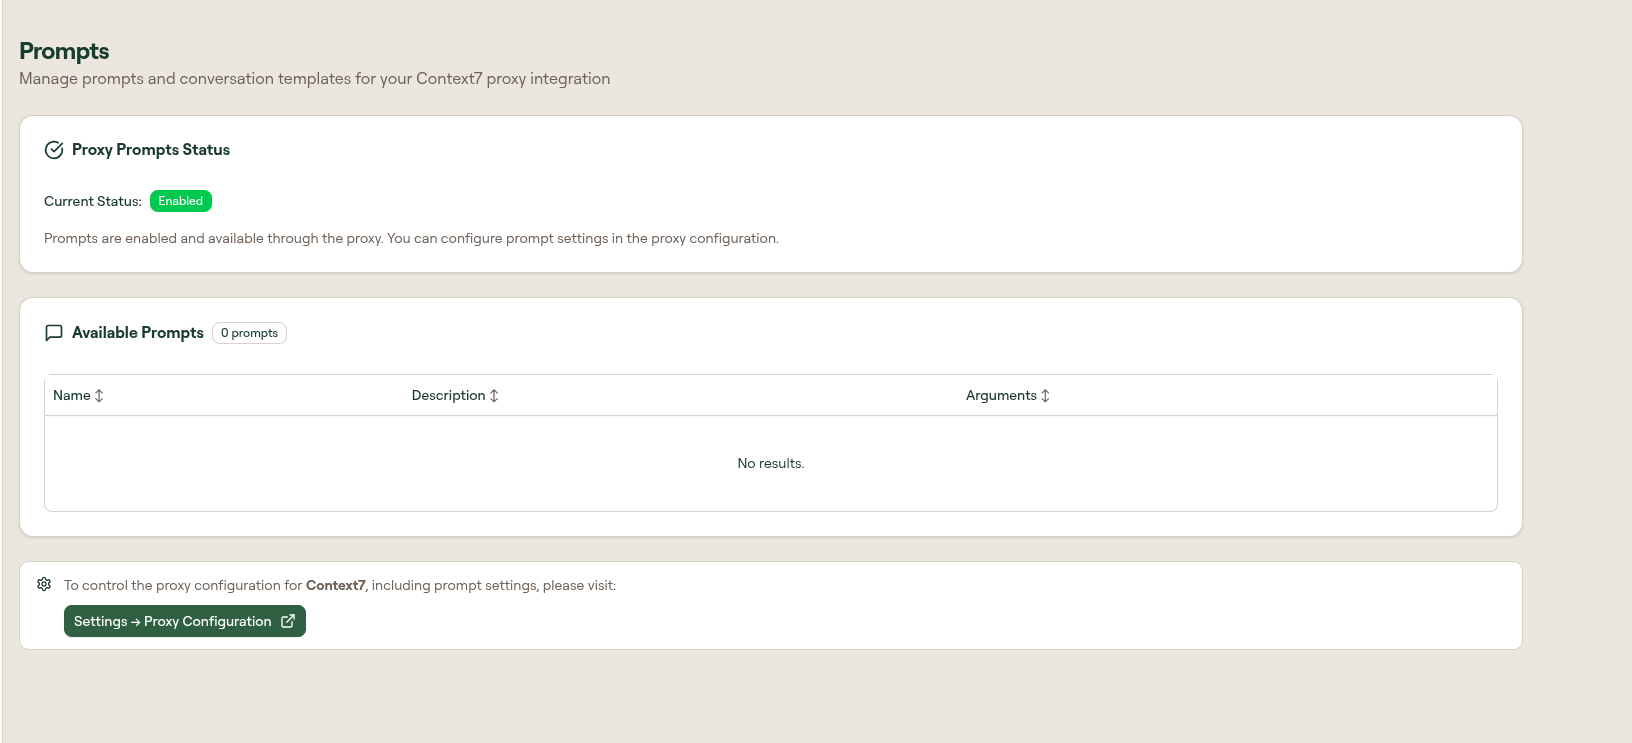
Open the Prompts tab next.
This tab works the same way for prompts and conversation templates. If the server exposes no prompts, the table remains empty.
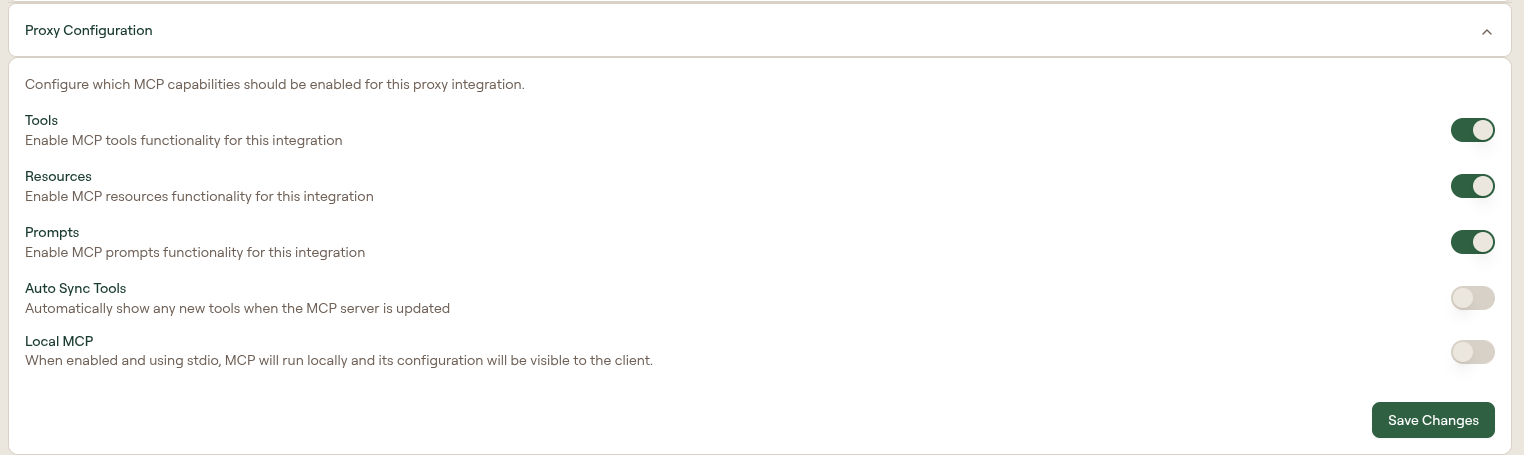
If resources or prompts are disabled and you need them, go to Settings > Proxy Configuration and enable the relevant capability.
For a first read-only tool call, resources and prompts are usually not required. The important thing is to know whether they are enabled and whether the server exposes any.
Step 6: Test one tool
On the Tools tab, open the row menu for a low-risk tool and select Test Tool.
The test modal shows an arguments editor and a result panel. Enter the smallest valid test input, then run the tool.
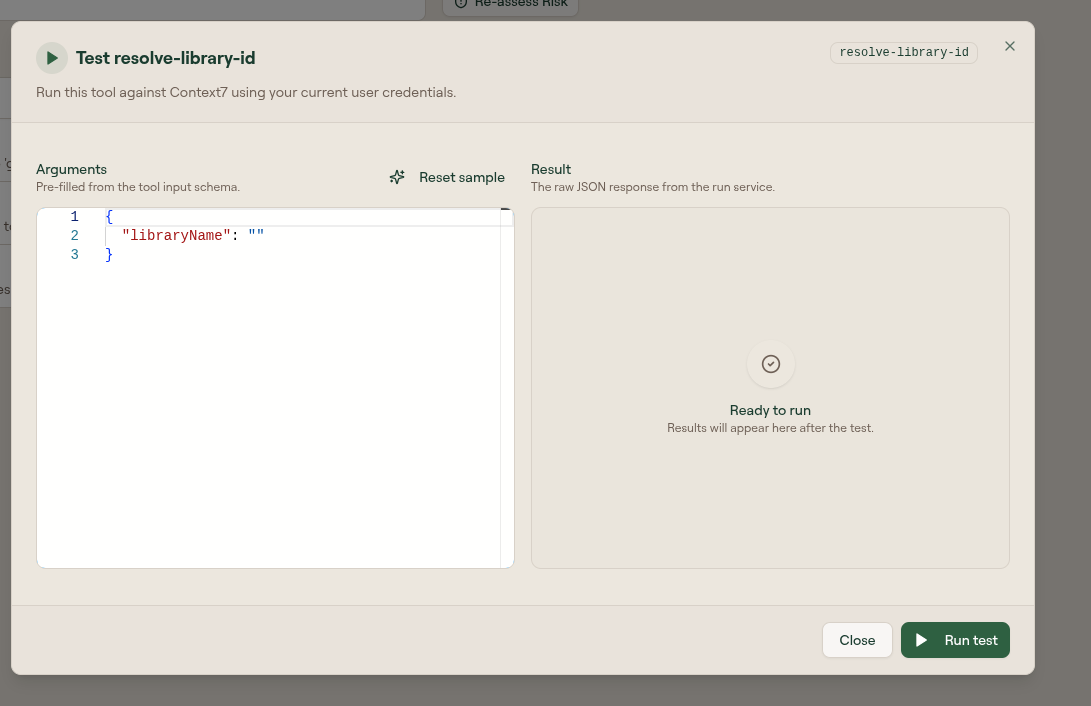
A successful test proves that Willow can reach the upstream MCP server and that the tool can execute with the current configuration.
If the test fails, use the error to identify the failing layer before moving on:
- missing or invalid arguments: adjust the test input
- authentication error: return to Setup and check the selected auth mode and credentials
- upstream connection error: check the MCP configuration, base URL, transport, and network reachability
- missing tool: run Sync Tools again and confirm the upstream MCP server exposes the tool
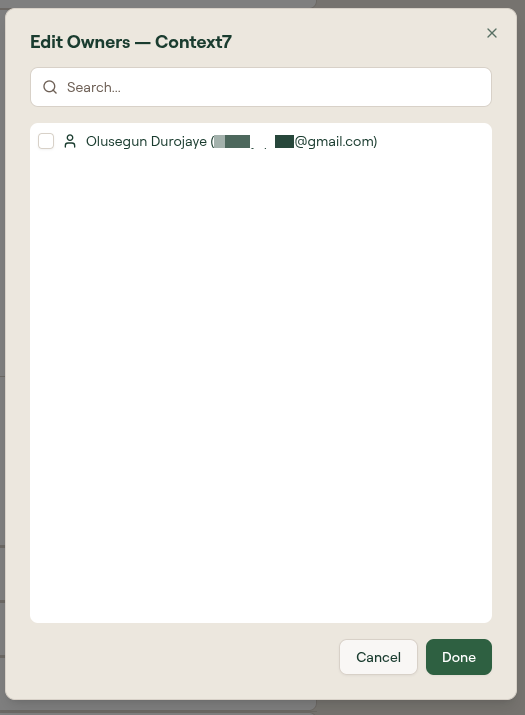
Step 7: Set an owner
Open the Settings tab, then expand General Settings.
Owners identify who is responsible for the MCP server in the admin dashboard. Select Edit under Owners, choose yourself or the responsible admin, then select Done and save the settings.
Ownership does not grant runtime access by itself. Users can only call the MCP server through the gateway after the server is assigned to a group they belong to.
Step 8: Assign the MCP server to a group
Open the server's Overview tab and find Connected Groups.
- Select Edit.
- Choose Admins for a first test, or choose the group that should use this server.
- Save the group selection.
Connected groups control runtime access. If a user is not in a connected group, their AI client cannot call this server's tools even if the server exists and the user can sign in.
For a deeper access model explanation, see Identity and Permissions.
Step 9: Publish or confirm the server is active
If the MCP server is still in draft status, publish it before asking users to connect.
- Review the server setup, enabled tools, owner, and connected groups.
- Select Publish if the server is a draft.
- Confirm the publish action if prompted.
- Return to the MCP Servers table and check that the server is active or otherwise ready for use.
Draft servers are useful for setup and testing, but ordinary users should only rely on published, active servers.
Verify it worked
You are done when all of these are true:
- the MCP server appears in the MCP Servers table
- the server has the expected transport and auth configuration
- at least one expected tool appears in the Tools tab
- at least one low-risk tool test succeeds
- the server has an owner
- the server is connected to the intended group
- the server is published or active
To verify the full runtime path, connect an AI client as a user in the connected group, run a low-risk tool call, and confirm the call appears in Monitor > Logs.
Next steps
Now that your first MCP server is configured, continue with: