Set Up Willow for the First Time
This tutorial takes a new Willow organization from an empty admin dashboard to a verified MCP tool call.
By the end, you will have:
- deployed your Willow MCP gateway domain
- added one MCP server
- published the MCP server so users can access it
- connected an AI client through Willow
- run a tool call
- confirmed the call in Logs
- created a group and assigned access
- invited your first user
Prerequisites
You need:
- admin access to a Willow organization
- an MCP server or integration you can safely test with
- an AI client that supports remote MCP connections, such as Cursor
- permission to invite at least one test user, if you want to verify access with another account
For the first run, choose a low-risk MCP server with a simple read-only tool. The goal is to prove the path before adding production systems.
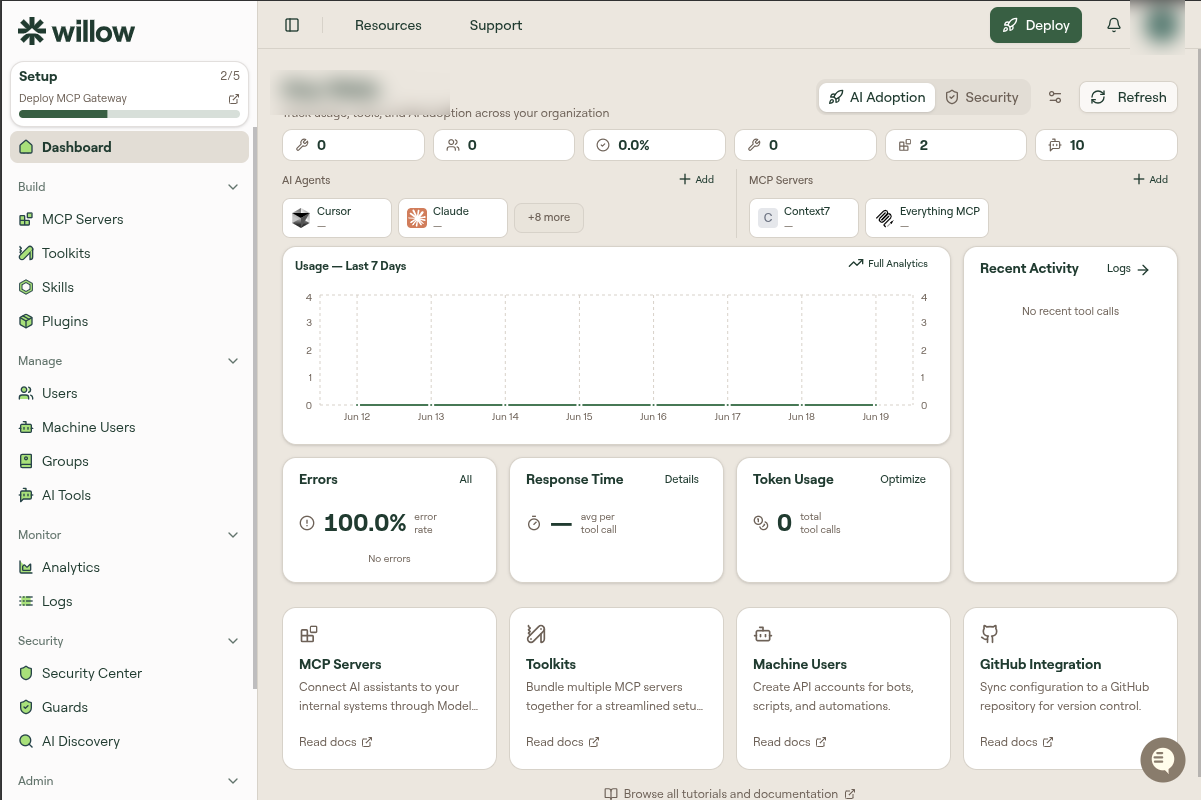
Step 1: Deploy the MCP gateway
The gateway is the runtime entry point for MCP traffic. AI clients connect to the gateway, and the gateway enforces identity, group access, and guard policy before forwarding tool calls to MCP servers.
In a new organization, the onboarding checklist starts with Deploy MCP Gateway. This step creates the Willow gateway domain your users will connect to.
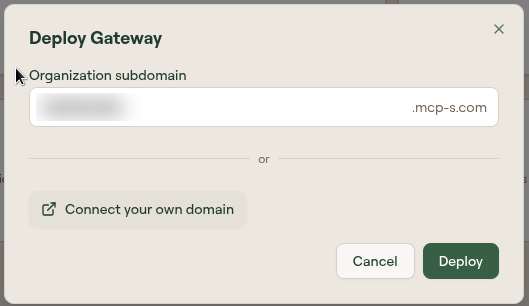
- In the top navigation, select Deploy.
- In the deploy modal, choose your organization subdomain.
- Confirm that the domain ends in
.mcp-s.com. - Select Deploy.
- Wait for the onboarding checklist to show MCP Gateway is Live!. The Deploy button in the top navigation is also replaced by your gateway address, shown as Your Basecamp: your-slug.mcp-s.com.
For example, if you choose acme, your gateway domain is:
https://acme.mcp-s.com
This domain is the base for the MCP URLs shown later in Connect MCP.
If your organization already has a gateway, you can skip deployment and confirm the configured domain under Admin > Settings > Gateway Settings. The Add Gateway modal supports Willow branded domain, Custom Domain, and External Run Service options.
If you need a custom domain, configure it from Gateway Settings. See Configure a Custom Gateway Domain.
Step 2: Add your first MCP server
After the gateway is ready, add one MCP server.
- In the admin dashboard, open Build.
- Open MCP Servers.
- Select Add MCP Server.
- Choose a catalog integration or configure a custom MCP server.
- Complete the required authentication and connection fields.
- Save the server.
After saving, Willow should discover the server's tools. Check that at least one tool appears and is enabled.
For the detailed MCP server flow, see MCP Servers.
Step 3: Set the owner and connected group
Before publishing, make sure the MCP server has the right owner and access group.
- On the MCP Servers list, open the three-dot menu for the MCP server you created.
- Select Edit.
- On the edit page, open the Settings tab.
- Under General Settings, find Owners.
- Select Edit.
- In the owner modal, select yourself or the person who owns this MCP server.
- Save the owner selection.
- Open the Overview tab.
- Scroll to the Connected Groups card.
- Select Edit.
- Select Admins for this first test, or select All Users if every user in the organization should have access.
- Save the connected group selection.
Ownership controls who is responsible for the MCP server in the admin dashboard. Connected groups control which users can access the server through the gateway.
Step 4: Publish the MCP server
New MCP servers can be saved as drafts. Draft MCP servers are visible to admins, but ordinary users cannot use them.
- Review the setup, tool list, owner, and connected groups.
- In the top-right corner of the MCP edit page, select Publish.
- Confirm the publish action if prompted.
- Check that the MCP server status changes from
drafttoactive.
Publishing makes the MCP server visible and usable for users who are granted access through groups.
Admin permissions alone do not grant gateway access. The gateway checks group membership when an AI client calls a tool.
For more detail, see Groups.
Step 5: Connect an AI client
Now connect an AI client through the Willow gateway.
- Open the end-user Willow workspace with the same user account you added to the group.
- Select Connect MCP.
- Choose your AI client.
- Copy the Willow MCP configuration or use the provided setup action.
- Add the configuration to your AI client.
- Restart or refresh the client if required.
- In your AI client, authenticate to Willow or to the specific MCP server when prompted.
Some clients show the authentication prompt automatically. Others require you to ask the client to log in, for example: Log in to the Willow MCP. Follow the client-specific instructions in the Connect MCP dialog.
See Connect MCP for client-specific connection instructions.
Step 6: Run your first tool call
In your AI client, ask for a simple action that uses the MCP server you added.
Use a low-risk request, such as listing available objects, reading a harmless test record, or calling an echo/status tool if the MCP server provides one.
The first call verifies several things at once:
- the AI client can reach the Willow gateway
- the user is authenticated
- group access allows the MCP server
- the MCP server is reachable from the gateway
- Willow can record the call in Logs
If the tool does not appear in your AI client, check that the MCP server is published, the server is assigned to your group, and the server is enabled for use before changing the client configuration.
Step 7: Verify the call in Logs
Return to the admin dashboard and open Monitor > Logs.
Find the entries for the connection and tool call you just made. A successful first run should show the AI agent, MCP server, tool name, user, status, duration, and execution details.
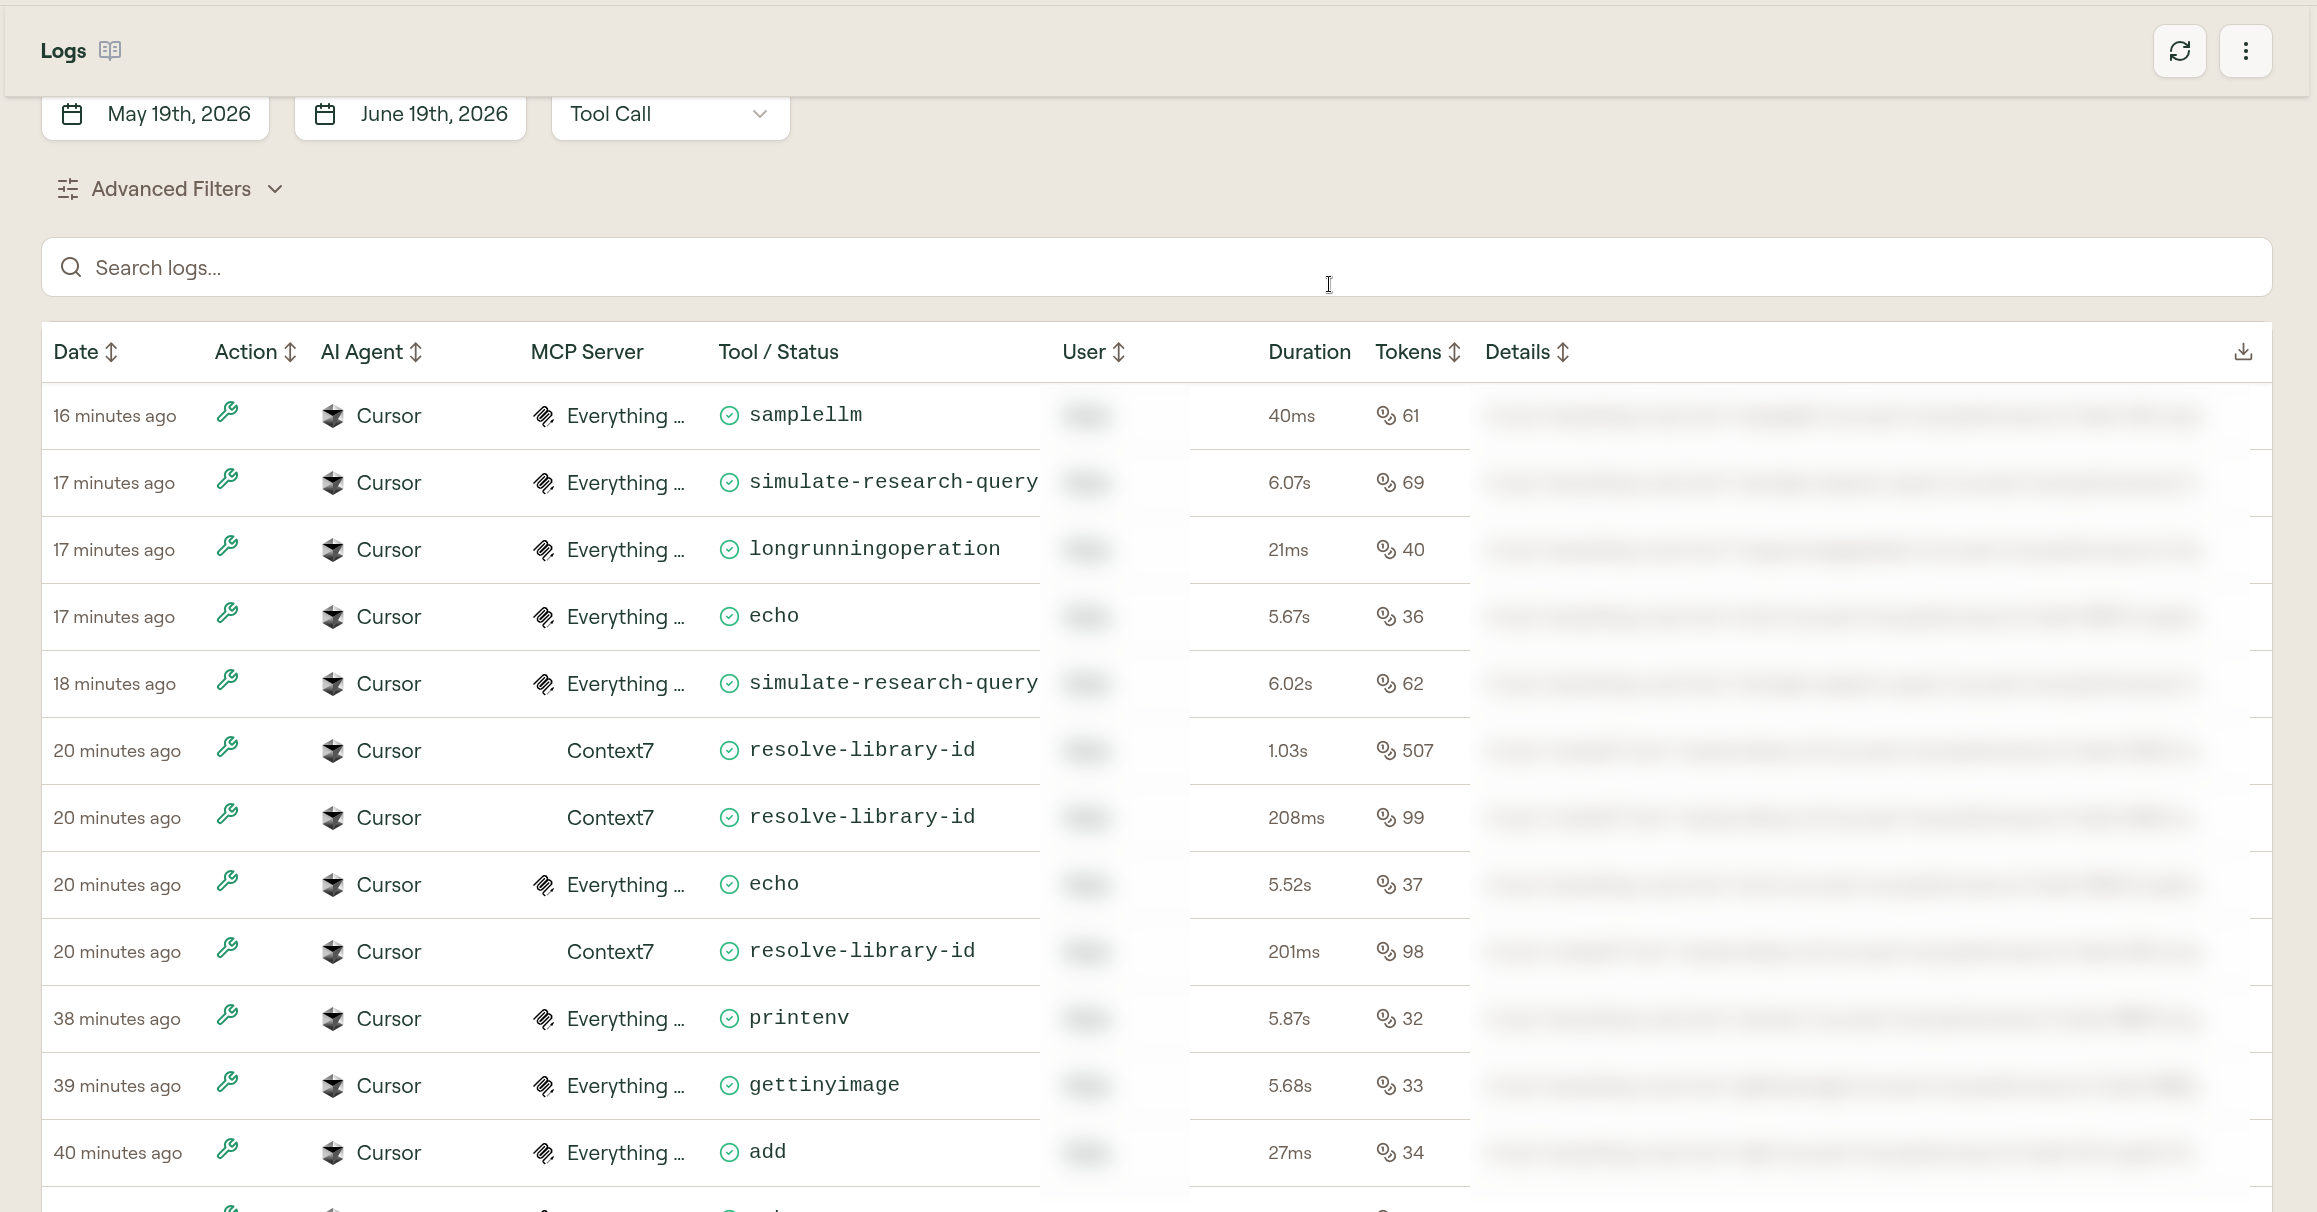
If the call failed, use the log status and error detail to identify the failing stage:
- authentication failure: check the user session, token, or OAuth flow
- access failure: check group membership and MCP server assignment
- tool not found: check MCP server tool discovery and the name exposed to the client
- upstream failure: check the MCP server connection and gateway network reachability
- guard failure: check runtime guard configuration
See Monitor Logs.
Step 8: Invite your first user
After your own account can make a verified tool call, invite one test user.
- Open Manage.
- Open Users.
- Invite the user's email address.
- Add the user to the same test group.
- Ask the user to sign in and connect their AI client.
- Confirm their first tool call appears in Logs.
This verifies that your setup works for a real end user, not only for the admin who created it.
For the full user-management flow, see Users.
Step 9: Enable SSO authentication
SSO is usually not required for the first tool call, but it should be part of production setup.
After the gateway, MCP server, groups, and logs are working, configure SSO for your organization. Then test sign-in and MCP connection with a user who comes from your identity provider.
See SSO Overview and SCIM Provisioning.
Verify it worked
You are done when all of these are true:
- a gateway is active
- at least one MCP server is added and has discovered tools
- the MCP server is published and active
- your user belongs to a group with access to that MCP server
- your AI client connects through the Willow MCP URL
- a test tool call succeeds
- the call appears in Logs with the expected user and MCP server
- at least one invited user can repeat the same flow
Next steps
Now that the basic path works, continue with: