Connect Your AI Client
Get your AI client talking to Willow in under 5 minutes.
Before you start
You need:
- An invite email from your admin (already accepted)
- One of these AI clients: Cursor, Claude Code, VS Code, Claude Web, ChatGPT, OpenCode, Codex, or Devin Desktop
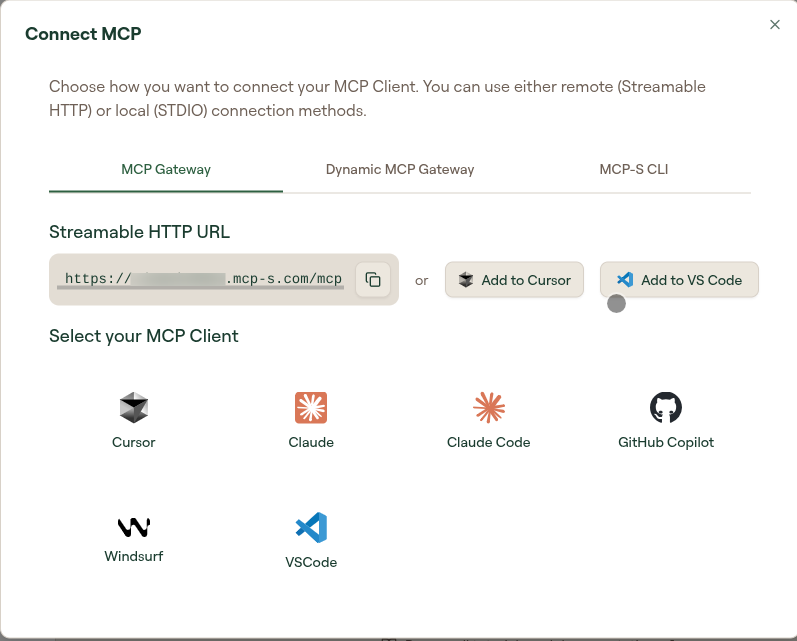
Step 1: Open the Connect MCP modal
Click Connect MCP at the bottom of the left sidebar.
The modal opens with three tabs across the top:
- MCP Gateway: Connect to one specific MCP server at a time. Most users start here.
- Dynamic MCP Gateway: Let Willow pick the relevant tools from all your servers automatically.
- MCP-S CLI: Connect from the command line instead of an AI client. See the MCP-S CLI Reference.
Stay on MCP Gateway unless your admin told you otherwise.
Step 2: Select your AI client
Below the tabs, you'll see a grid of supported AI clients. Click your client.
The panel below the grid updates to show the exact connection instructions for your client and the server you're connecting to.
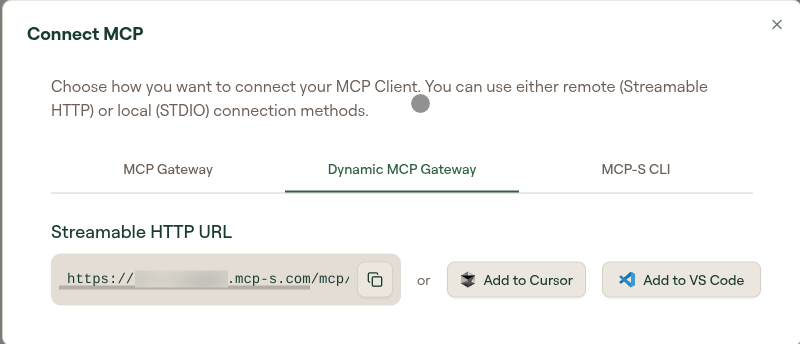
The URL shown looks like:
https://yourorg.mcp-s.com/mcp?mcp=servername
Cursor and VS Code users: A one-click button ("Add to Cursor" or "Add to VS Code") appears. Click it. Your client opens and configures automatically. Skip to Step 4.
Everyone else: Copy the URL shown and continue to Step 3.
Step 3: Configure your client manually
Paste the URL into your client's MCP server config. The exact location depends on your client. See Per-Client Setup for detailed instructions.
Step 4: Authorize
When your client connects to Willow for the first time, it will show an authorization prompt. Click Authorize (or equivalent) to confirm.
If you don't see a prompt, restart your client and try again.
Step 5: Verify it worked
In your AI client, ask:
"List what tools you have access to"
Your AI responds with the available tools. You're connected.
If you see an error instead, see Troubleshooting.
Per-client guides
Need step-by-step instructions for your specific client?