Make MCP Servers, Toolkits, Skills, and AI Tools Available to Users
This tutorial takes you from configured resources in the admin dashboard to an end-user workspace with the right MCP servers, toolkits, skills, and AI client options. You will choose whether access is for a specific team or everyone, assign group-scoped resources, and enable the AI tools users are allowed to connect.
By the end, you will have:
- chosen a custom group or All Users as the audience
- published and assigned at least one MCP server
- published and assigned at least one toolkit
- published and assigned at least one skill
- enabled the AI tools users may connect
- verified the resources from an end-user account
MCP servers, toolkits, and skills are assigned through groups. AI Tools are enabled for the organization rather than assigned to individual groups. Commands are user-owned and shared directly with specific people.
Prerequisites
You need:
- admin access to Willow
- at least one user who has accepted their invitation
- at least one MCP server with its expected tools synced and enabled
- at least one organization toolkit
- at least one organization skill
If you still need to add these resources, start with Add and Configure Your First MCP Server, Create a Toolkit, and Create and Publish a Skill.
Step 1: Choose who should receive access
Open Manage > Groups.
Willow creates Admin and All Users groups automatically. Choose the access model that matches what you are distributing:
| Audience | Group to use |
|---|---|
| One team, department, or user type | Create or use a custom group containing only those users. |
| One specific user | Create a narrowly scoped group and add that user. This keeps resource assignment in the same group-based access model. |
| Everyone in the organization | Use All Users. |
| Administrators testing before rollout | Use Admin. |
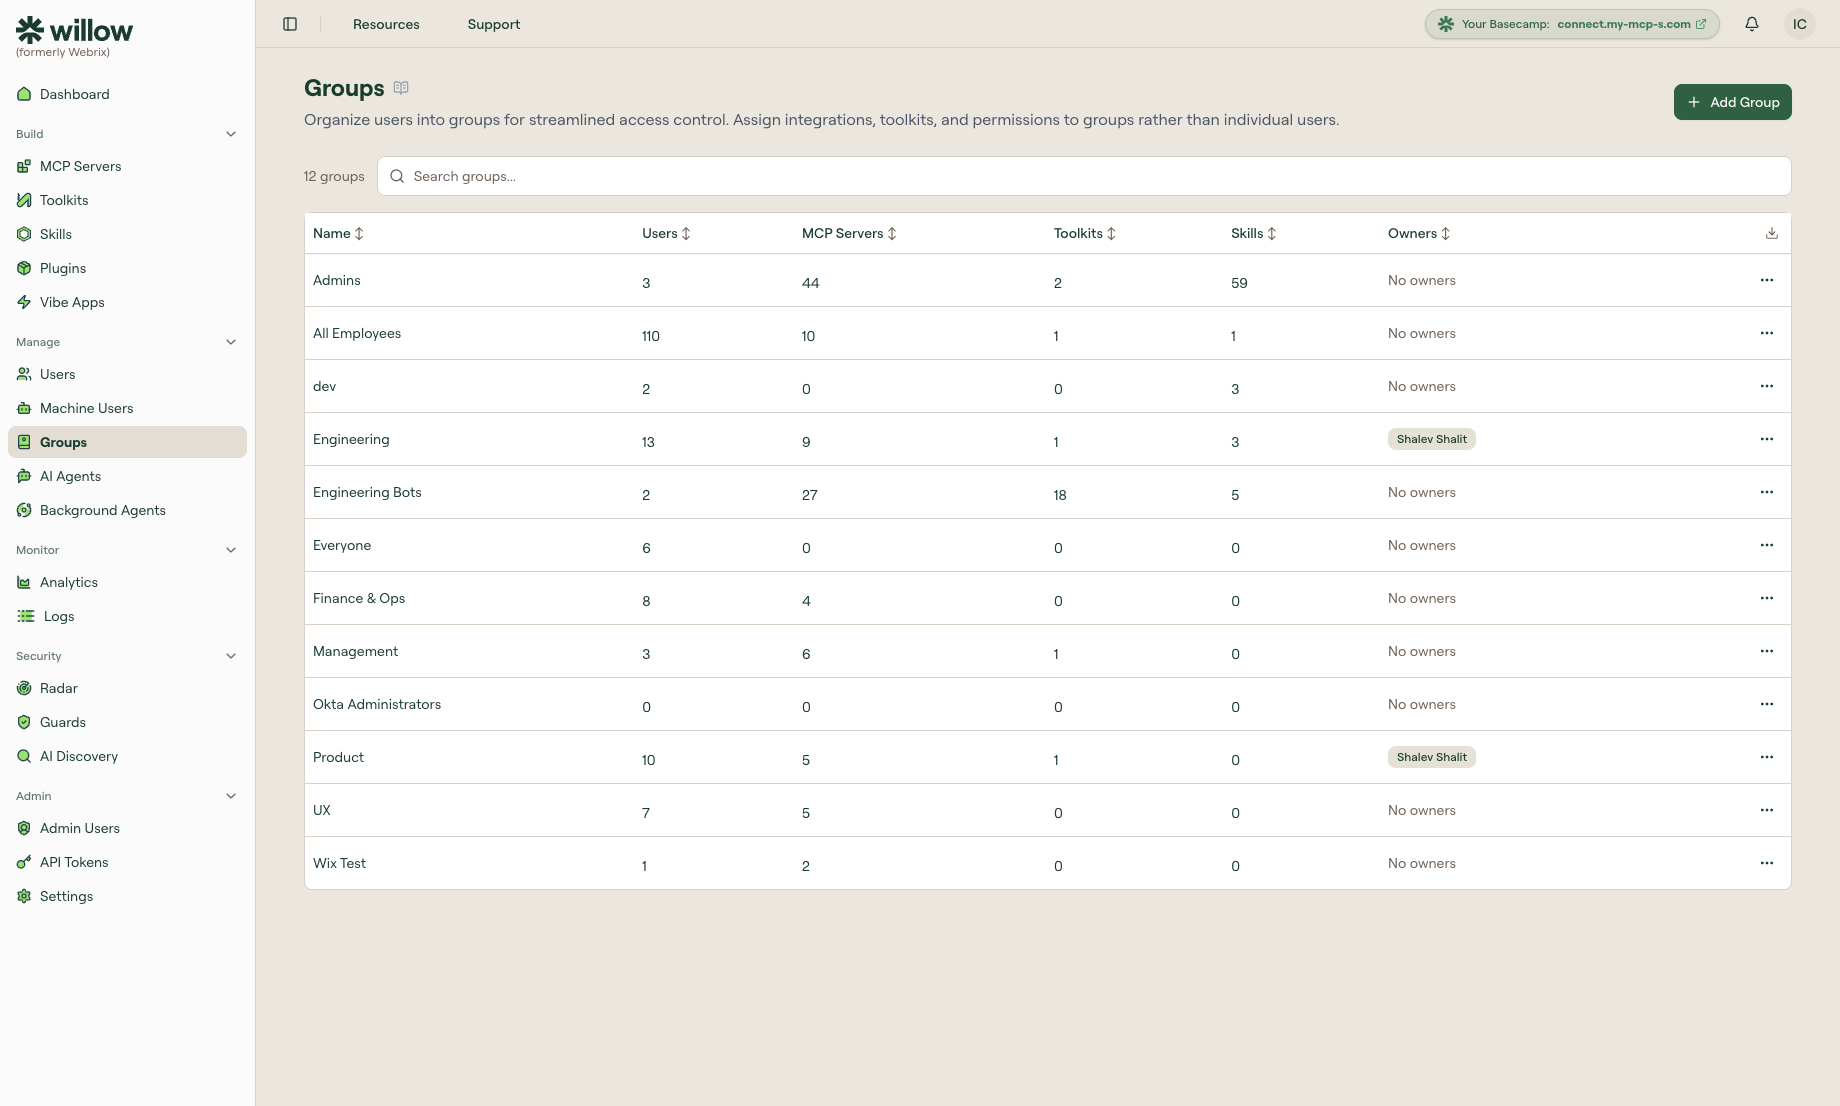
For a custom audience, select + Add Group, enter a name, and select Create. Use a name that describes the audience, such as Engineering, Support, or MCP Pilot.
Step 2: Add users to the group
Skip this step if you are using All Users or if the intended users are already members of your chosen group.
- Open the
...menu for the group. - Select Edit Users.
- Check each user or machine user who should receive access.
- Select Done.
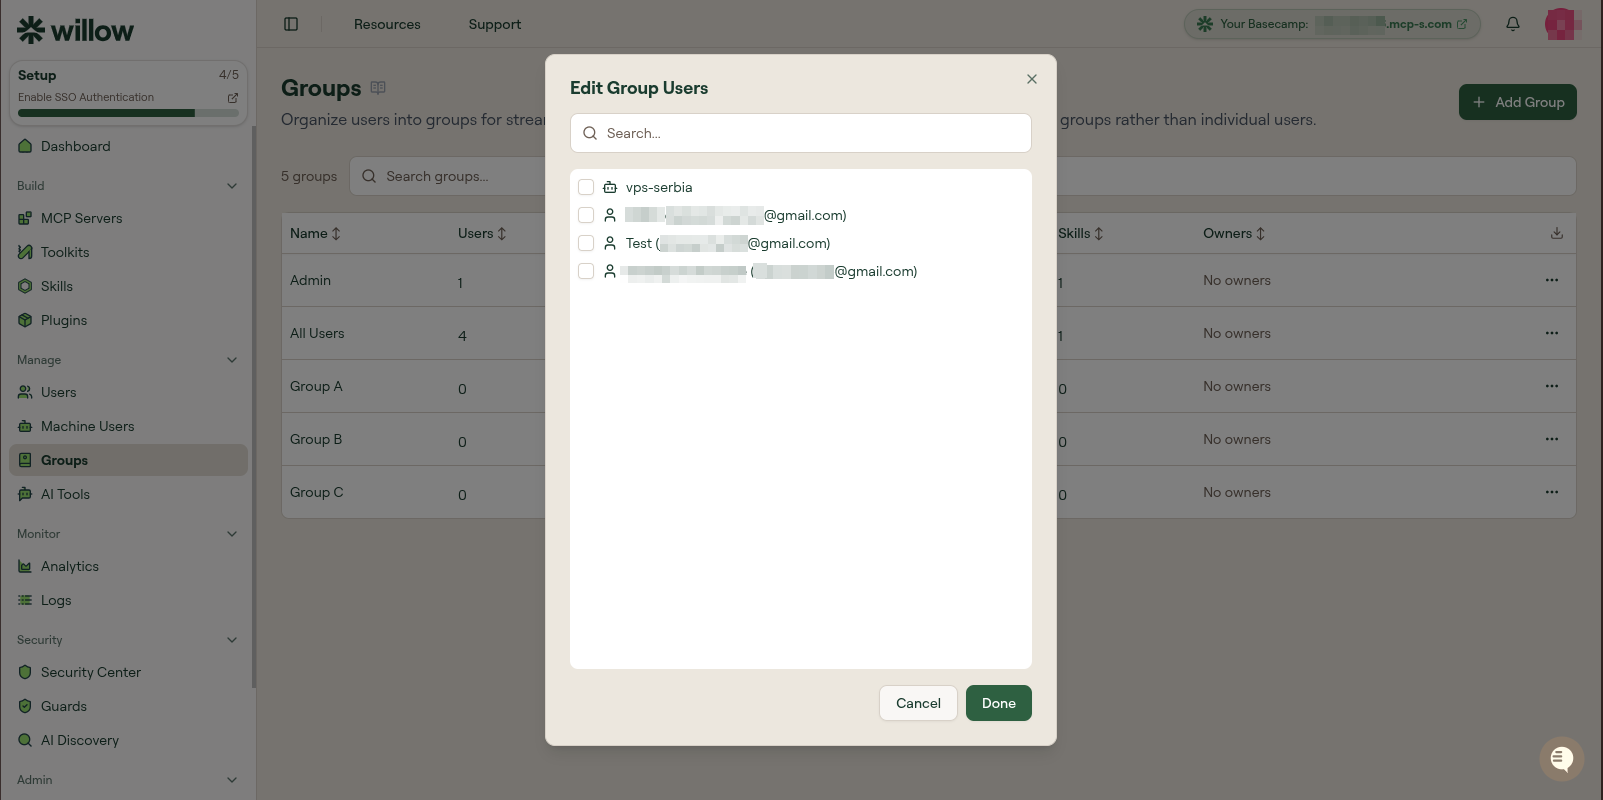
The Users count on the group row updates. Group membership is cumulative: if someone belongs to multiple groups, they receive the combined resources assigned through all of them.
Step 3: Prepare the MCP server
Before assigning an MCP server, confirm it is ready for end users.
- Open Build > MCP Servers.
- Confirm the server's status is
active. If it is a draft, open it, review the configuration, and select Publish. - Open the server and select the Tools tab.
- Select Sync Tools if the list is empty or stale.
- Enable the tools users should be able to invoke. Disabled tools remain hidden even when the server is assigned to the correct group.
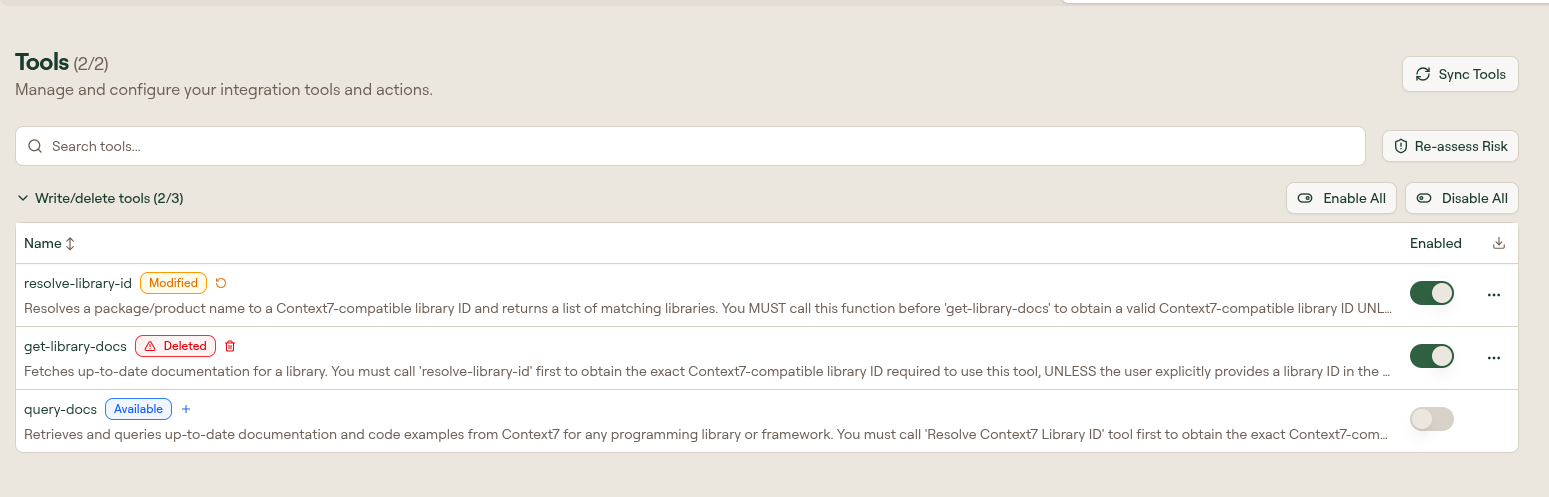
Keep destructive or write-heavy tools disabled unless users need them and the appropriate guards and approval requirements are in place.
Step 4: Assign the MCP server
Return to Manage > Groups.
- Open the
...menu for your chosen group. - Select Edit MCP Servers.
- Check each MCP server the group's members should access.
- Select Done.
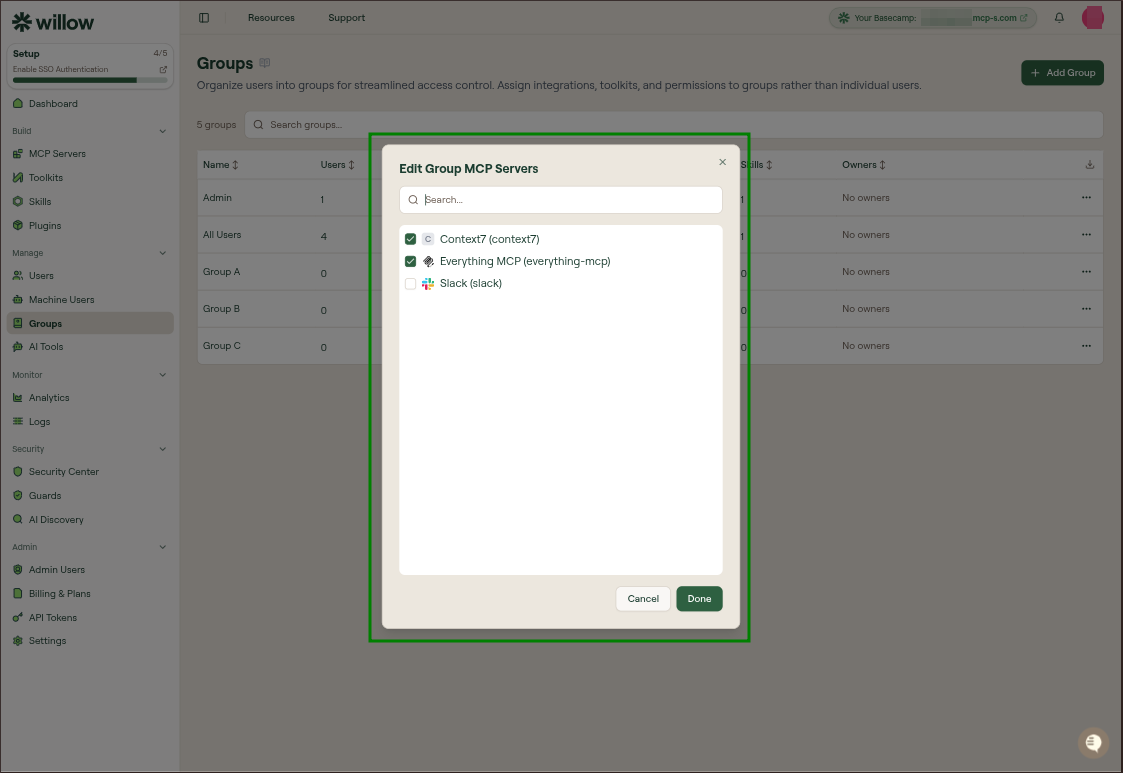
The MCP Servers count on the group row updates. Assignment does not override lifecycle or tool settings: only published servers and enabled tools are reachable through the gateway.
Step 5: Publish and assign the toolkit
Open Build > Toolkits and select Org Toolkits.
- Find the toolkit you want to distribute.
- If its status is
draft, open the row's...menu and select Publish. - Return to Manage > Groups.
- Open the chosen group's
...menu and select Edit Toolkits. - Check each toolkit the group should receive, then select Done.
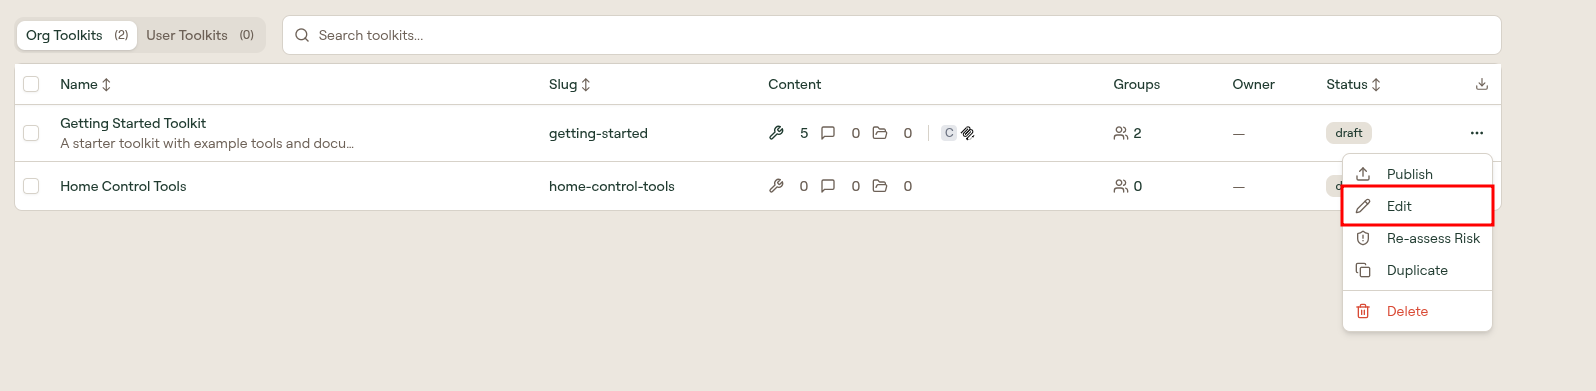
The toolkit appears in the workspace of users in the assigned group. Group assignment does not grant access to the toolkit's underlying MCP servers, so assign those servers to the same group before users connect with the toolkit.
Step 6: Publish and assign the skill
Open Build > Skills and select Org Skills.
- Find the skill you want to distribute.
- If its status is
draft, open the row's...menu and select Publish. - Return to Manage > Groups.
- Open the chosen group's
...menu and select Edit Skills. - Check each skill the group should receive, then select Done.
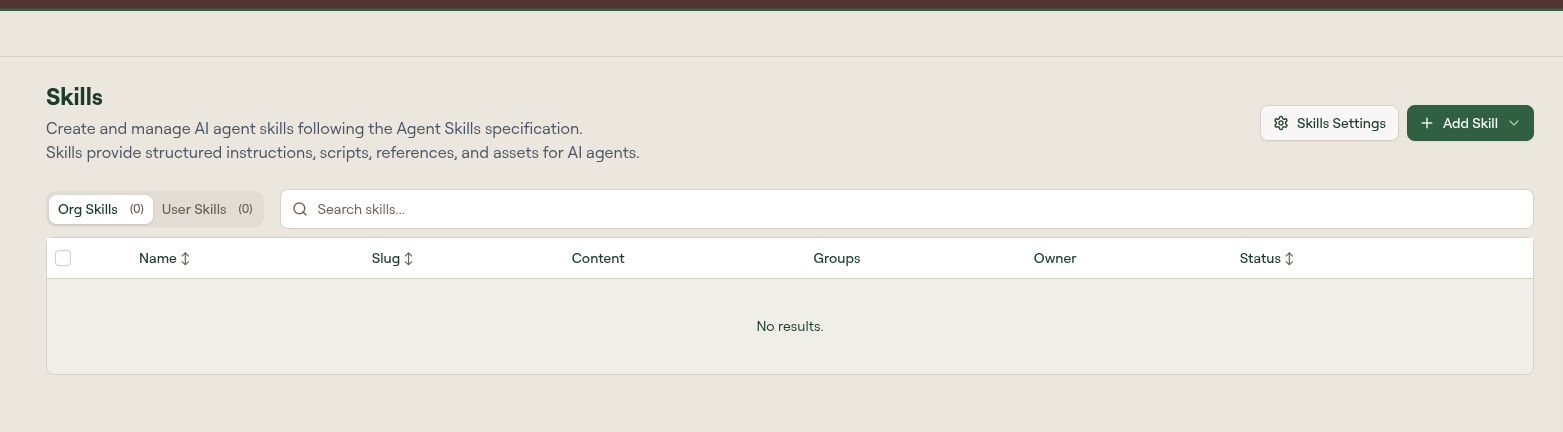
Published skills assigned to a user's groups become available to that user's AI client automatically. Users do not need to install each skill themselves.
Step 7: Enable AI Tools
Open Manage > AI Tools.
The Enabled toggle controls whether users may connect with each supported AI client. Turn on the clients your organization allows, such as Cursor, Claude, Claude Code, Codex, GitHub Copilot, ChatGPT, or VSCode.
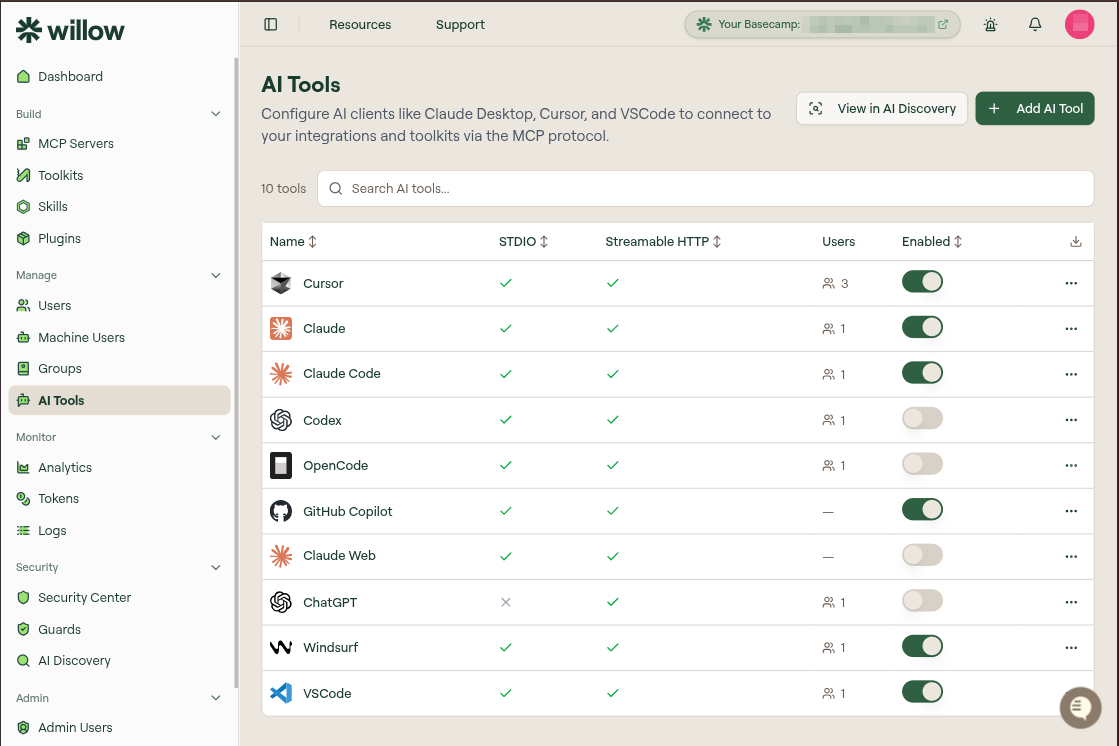
AI Tools are enabled organization-wide rather than assigned to individual groups. Enabling a client makes its connection option available; it does not grant additional MCP server, toolkit, or skill access.
If a client needs different connection instructions or transport support, open its row, update the configuration, and select Save. See AI Tools for the full field reference.
Step 8: Verify the end-user experience
Sign in to the Connect workspace as a user in the target group.
Check MCP servers
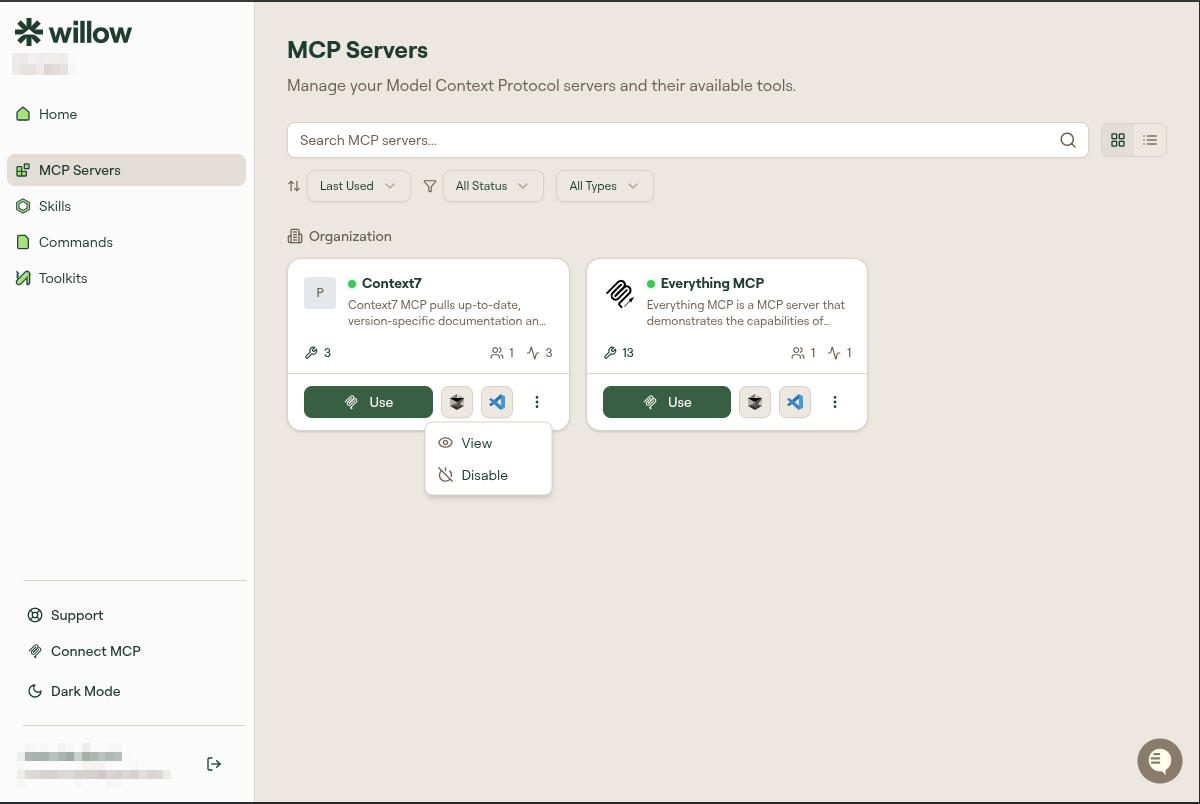
Open MCP Servers. The assigned servers should appear in the user's list. The user can enable a server, choose individual tools that are not locked by the organization, and select Use to connect it to an AI client.
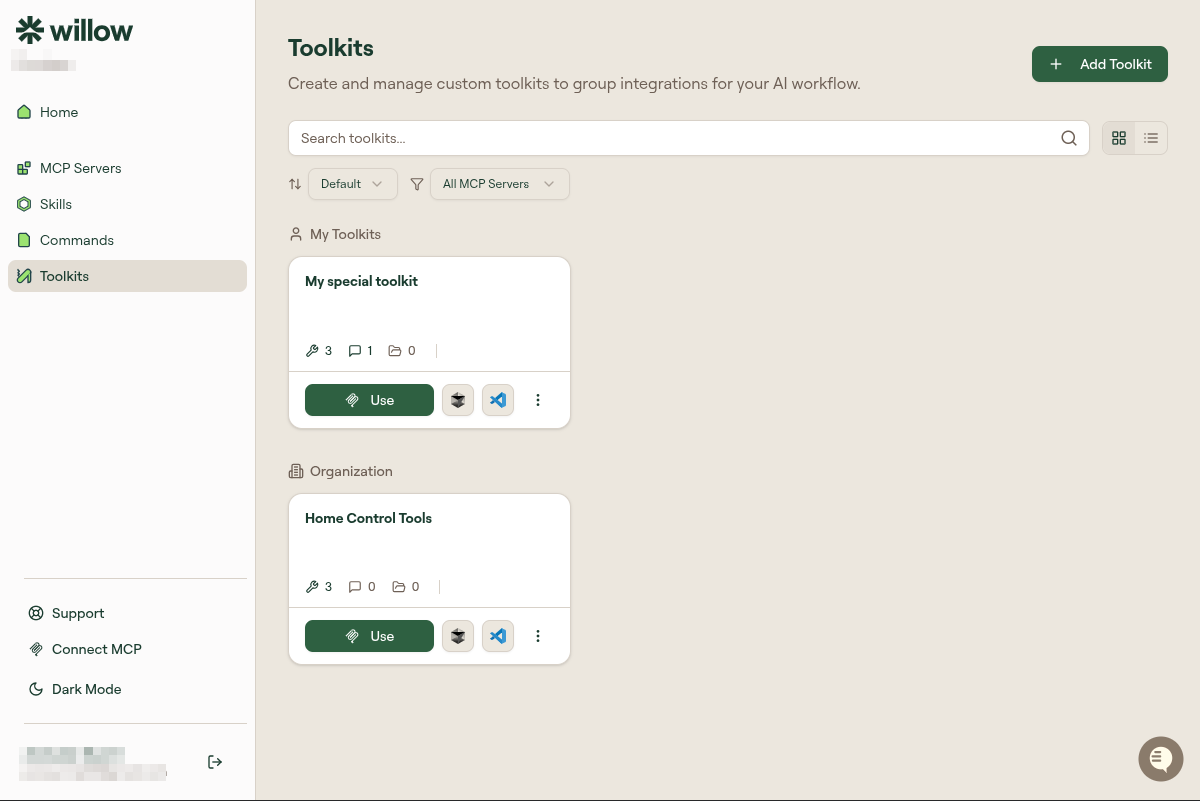
Check toolkits
Open Toolkits. The assigned organization toolkit should appear in the available toolkits section. Select Use to authenticate its MCP servers and connect an AI client with the toolkit-specific URL.
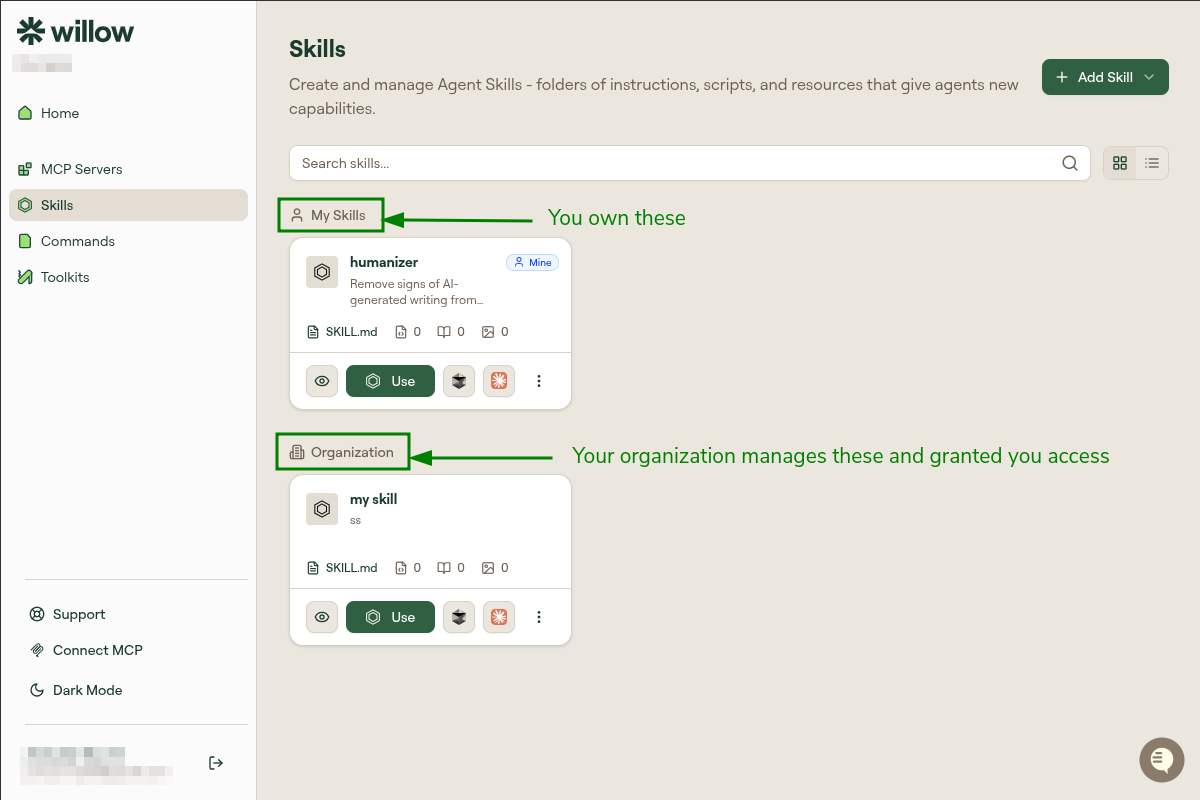
Check skills
Open Skills. Assigned organization skills appear separately from the user's personal skills and are already available to their AI client.
Check AI Tools
Select Connect MCP at the bottom of the sidebar. Confirm the enabled client appears as a connection option, then follow its setup instructions and connect through the Willow gateway.
Run a low-risk tool call from the connected client. In the admin dashboard, open Monitor > Logs and confirm the call is attributed to the expected user, AI client, MCP server, and tool.
Verify it worked
You are done when all of these are true:
- the intended users belong to the custom group, or the resources are assigned to All Users
- the MCP server is published and assigned to that group
- the tools users need are enabled
- the toolkit is published and assigned to that group
- the skill is published and assigned to that group
- the permitted AI Tools are enabled
- an end user can see the assigned MCP server, organization toolkit, and organization skill
- the enabled AI client appears in Connect MCP
- a test tool call succeeds and appears in Monitor > Logs
If something is missing, check the layers in order: publish state, organization-level enablement, group assignment, group membership, and user-side server enablement.