API Tokens
API tokens provide secure, programmatic access to your organization's resources. Tokens are scoped to your organization and can be created with fine-grained permission scopes to limit access.
Manage them from Admin > API Tokens. Each token shows its scopes, expiration, when it was created, and when it was last used, with actions to edit or revoke it. Tokens that never expire or that use the unrestricted all scope are flagged with a warning.
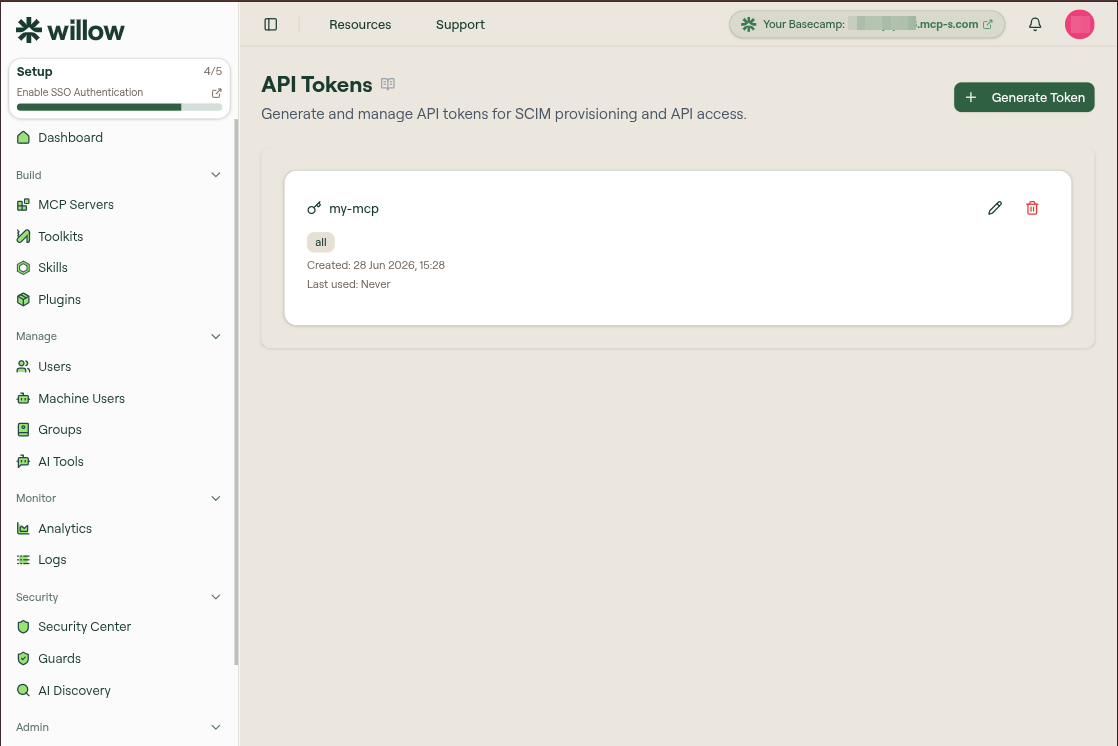
Current Capabilities
API tokens support:
- Admin API – Manage MCP servers, toolkits, skills, users, groups, policies, and commands
- SCIM Provisioning – Automate user and group management from your identity provider (Okta, Microsoft Entra ID, etc.)
- User API – Access user-scoped resources such as toolkits, skills, commands, and connections
See the API Reference for full endpoint documentation.
Generating a Token
- Go to Admin > API Tokens
- Select Generate Token
- Enter a descriptive name (for example, "Okta SCIM Integration")
- Select the permission scopes for the token. Scopes start unselected — pick only what the token needs. You can still choose
all, but that is flagged as a warning. - Set an expiration. The default is 90 days. You can pick a preset, a custom date, or never. Never-expiring tokens show a warning.
- Select Generate
- Copy your token immediately – it will not be shown again
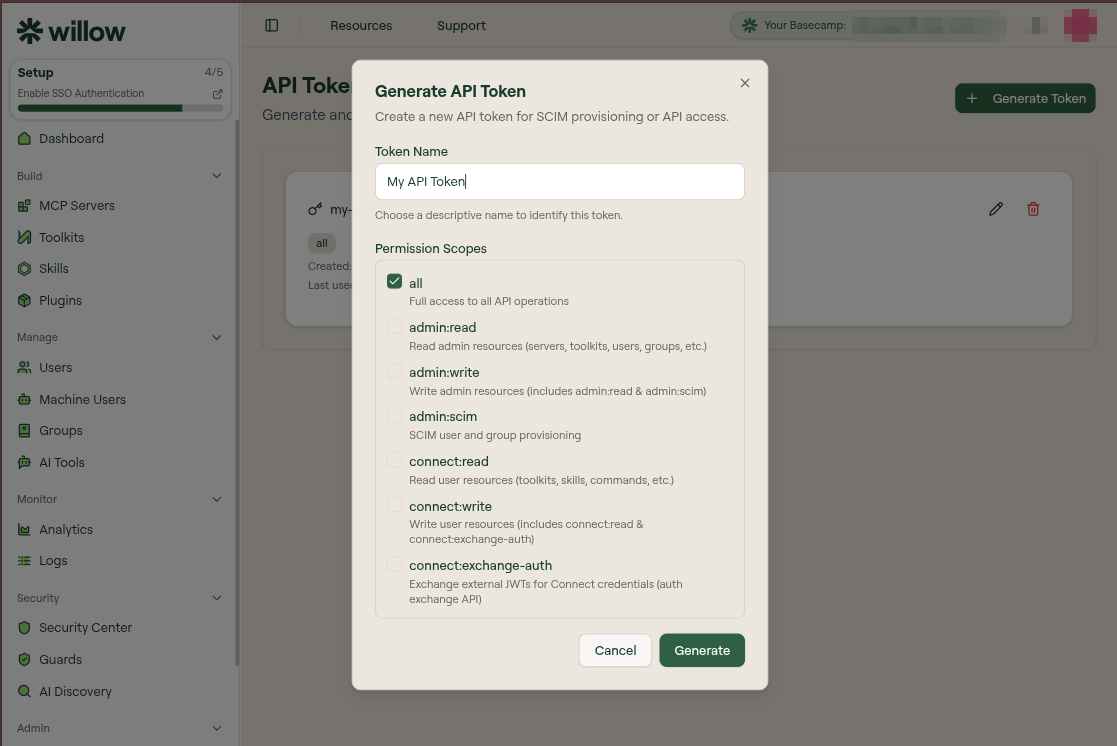
The token is displayed only once after generation. Store it securely. If you lose the token, you'll need to generate a new one.
Expiration
New tokens expire after 90 days by default. When generating or editing a token you can:
- Pick a preset (7 days, 30 days, 90 days, or 1 year)
- Choose a custom date and time
- Choose Never expires — this shows a warning, because a leaked token would stay valid until it is revoked
Expired tokens are rejected when they are used. Existing tokens created before expiration was added have no expiry; the list flags them so you can set one.
Permission Scopes
When generating a token, you choose which scopes it should have. This follows the principle of least privilege: only grant the access a token needs.
| Scope | Description |
|---|---|
all | Full access to all API operations |
admin:read | Read-only access to admin resources (MCP Servers, Toolkits, Skills, Users, Groups, Policies, Commands) |
admin:write | Read & write access to admin resources (includes admin:read and admin:scim) |
admin:scim | SCIM provisioning access only |
connect:read | Read-only access to user-scoped resources (User API) |
connect:write | Read & write access to user-scoped resources (includes connect:read and connect:exchange-auth) |
connect:exchange-auth | Exchange external JWTs for Connect credentials (auth exchange API) |
run:impersonate | Authenticate gateway tool calls as any user in the organization, selected with an x-user-email or x-user-id header |
Scope Hierarchy
Broader scopes automatically include narrower ones:
allincludes every scopeadmin:writeincludesadmin:readandadmin:scimconnect:writeincludesconnect:readandconnect:exchange-auth
Choosing Scopes
| Use Case | Recommended Scope |
|---|---|
| Full automation (CI/CD, scripts) | all |
| Okta / Entra ID SCIM sync | admin:scim |
| Read-only monitoring / auditing | admin:read |
| Infrastructure-as-code (Terraform, Pulumi) | admin:write |
| MCP client plugins (read user resources) | connect:read |
| MCP client plugins (manage user toolkits) | connect:write |
| Embedded agent calling the gateway as your end users | run:impersonate |
run:impersonate acts as anyoneA token with run:impersonate can make gateway tool calls as any user in the organization, including admins, by naming them in an x-user-email header. Keep it on your server, give it no other scopes, and use a separate token per application so revoking one does not cut off the rest. Where your application holds an IdP-issued JWT for the user, prefer Auth Exchange — there the JWT proves the identity instead of your service asserting it. See How Agents Connect to Willow.
Using the Token
Include the token in the Authorization header of your API requests:
curl -H "Authorization: Bearer wxt_xxxxx" \
  https://your-domain.example.com/api/users
For User API endpoints, also include a header that identifies which user to act as — either x-user-email (a regular user) or x-machine-user (a machine user's slug), but not both:
# Act as a regular user
curl -H "Authorization: Bearer wxt_xxxxx" \
     -H "x-user-email: user@example.com" \
  https://your-domain.example.com/api/skills

# Act as a machine user (bots, scripts, automations)
curl -H "Authorization: Bearer wxt_xxxxx" \
     -H "x-machine-user: ci-deploy-bot" \
  https://your-domain.example.com/api/skills
Send exactly one. Omitting both headers returns 400, and so does sending both.
Token Format
Tokens are prefixed with wxt_ followed by a cryptographically random string:
wxt_aBcDeFgHiJkLmNoPqRsTuVwXyZ1234567890abc
Security
- Hashed Storage – Tokens are hashed before being stored. The plain token is never persisted.
- Organization Scoped – Each token is tied to a specific organization.
- Permission Scoped – Each token is restricted to the scopes selected at creation time.
- Expiring – New tokens expire after 90 days unless you choose a different lifetime (or never). Expired tokens are rejected at authentication.
- Usage Tracking – The system tracks when each token was last used.
- Revocable – Tokens can be revoked instantly from the API Tokens page.
Editing a Token
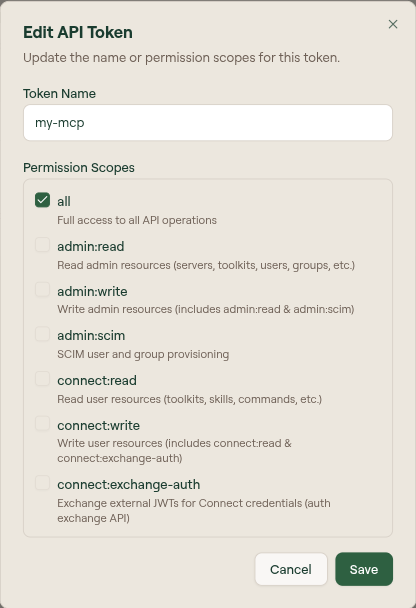
You can rename a token, change its permission scopes, or update its expiration after it has been created. The token value itself does not change, so integrations using it keep working.
- Go to Admin > API Tokens
- Select the edit (pencil) icon next to the token
- Update the token name, permission scopes, or expiration
- Select Save
Revoking a Token
- Go to Admin > API Tokens
- Select the revoke (trash) icon next to the token
- Confirm the revocation
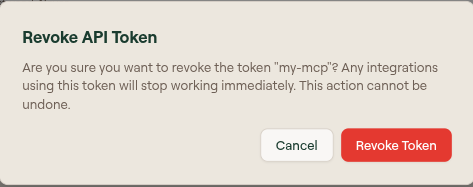
Revoking a token immediately invalidates it. Any integrations using that token will stop working, and the action cannot be undone.
Best Practices
- Use descriptive names – Name tokens after their purpose (e.g., "Okta SCIM", "Entra ID Sync")
- Use minimal scopes – Only grant the scopes a token actually needs. Avoid
allunless you truly need every API. - Set an expiration – Prefer a finite lifetime (90 days by default) over never-expiring tokens
- Rotate tokens periodically – Generate new tokens and revoke old ones on a regular schedule
- Use separate tokens – Create different tokens for different integrations, each with their own scopes
- Monitor usage – Check the "Last used" timestamp to identify unused tokens
- Revoke unused tokens – Remove tokens that are no longer needed
Backward Compatibility
Existing tokens created before scopes were introduced are treated as having the all scope and continue to work without any changes. Because all includes run:impersonate, those tokens can also authenticate gateway calls as any user in the organization — worth auditing and narrowing.
Tokens created before expiration was added have no expiry and are treated as never-expiring. They keep working, and the API Tokens page warns on each one.
On-Premises Deployments
For on-premises deployments, you can alternatively use the AUTH_SECRET environment variable for SCIM authentication. This provides backward compatibility for simpler setups that don't require multiple tokens. The AUTH_SECRET has full access equivalent to the all scope.
See SCIM Provisioning for more details on configuring SCIM endpoints.