Create a Toolkit
This guide covers both ways to create an organization toolkit: building one by hand, or describing an agent and letting Willow assemble it. Open Build > Toolkits to start.
Prerequisites
You need:
- admin access to Willow
- at least one published MCP server, so the toolkit has tools to include
- for AI creation only: an AI provider connected under Settings › AI Settings with Bring Your Own AI enabled
Create a toolkit manually
- Open Build > Toolkits.
- Select Add Toolkit.
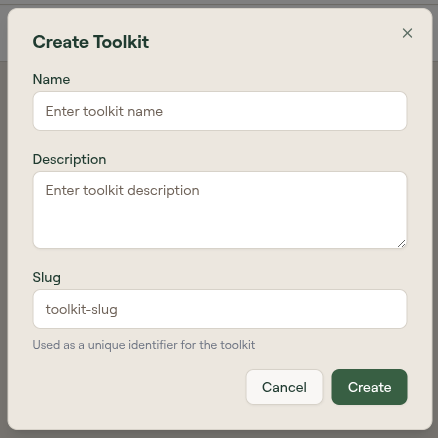
- Fill in the dialog:
- Name: what to call the toolkit (for example, "Frontend Dev" or "Incident Response").
- Description: what the toolkit is for.
- Slug: URL-safe identifier, auto-generated from the name.
- Select Create. Willow creates the toolkit as a
draftand opens its edit page.
- On the Tools tab, add the tools this toolkit should expose. Optionally add context on the Prompts and Resources tabs. See Toolkit Edit Page Reference for every field.
- Select Save on the details form to persist changes.
Create a toolkit with AI
When Bring Your Own AI is enabled, an Add with AI panel appears above the list. Describe the agent you want and Willow selects the tools for you.
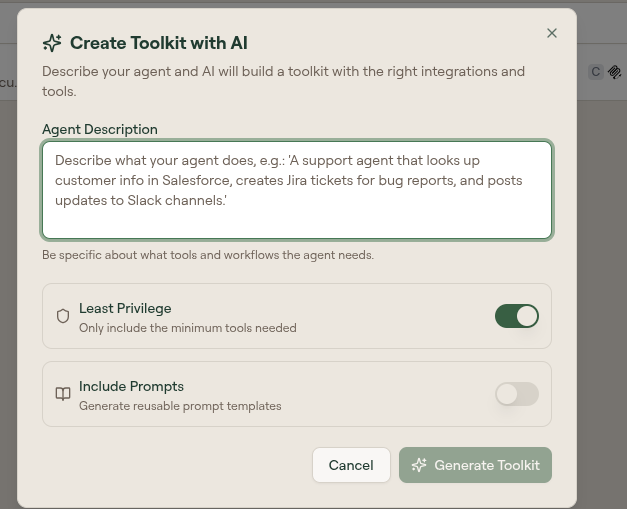
- In the Agent Description field, describe what the agent does. Be specific about which apps and actions it needs; the more concrete the description, the better the result.
- Set the two options:
- Least Privilege (on by default): limit the result to the minimum tools the agent needs.
- Include Prompts (off by default): also generate reusable prompt templates for the workflow.
- Select Generate Toolkit. Willow analyzes your connected integrations and proposes a toolkit with a name, slug, description, and selected tools.
- Review the result, then create it. The toolkit opens on its edit page, where you can fine-tune it like any other.
Publish the toolkit
A new toolkit starts as a draft and is not available for use until published.
- From the Toolkits list, open the
...menu on the toolkit row. - Select Publish.
- Confirm in the dialog. The status changes to
active.
To let people use the toolkit, assign it to a group. To distribute it through your marketplace, wrap it in a plugin.
What to do next
- Toolkit Edit Page Reference: configure Tools, Prompts, and Resources
- Toolkits: list columns, scopes, and row actions
- Assign toolkits to groups