Configure Okta
Set up Okta as your identity provider using the Willow app in the Okta Integration Network (OIN).
Before you start, find your callback URL on the Configure SSO page: {gatewayUrl}/api/auth/callback/okta.
Add the Willow integration in Okta
- Sign in to your Okta Admin Console at
https://{your-org}-admin.okta.com/admin/apps/add-app - Navigate to Applications → Applications, then select Browse App Catalog
- Search for Webrix (the integration is listed under this name; a rebrand to Willow is in progress) and select + Add Integration
- Fill in the application details:
- Application label: "Willow" (recommended)
- Willow Admin URL:
app.withwillow.ai(SaaS) or yourAPP_URL(On-Premise) - Willow Connect URL: your Willow gateway URL, shown in the app (SaaS) or your
CONNECT_URL(On-Premise)
- Select Done
Configure SSO in Okta
- In the Willow app on Okta, go to the Sign On tab
- Select Edit
- Set Application username format to Email
- Select Save
- Copy the Client ID and Client Secret (shown on the Sign On tab for OIN OIDC apps)
For more details, see Okta's guide to adding app integrations from the catalog and assigning users to applications.
Finish in Willow
- Go to Admin → Settings → Authentication Settings
- Select Provider: Okta
- Enter:
- Client ID and Client Secret from the previous step
- Issuer: your Okta authorization server URL (e.g.
https://dev-123456.okta.com/oauth2/default)
- Select Save Changes
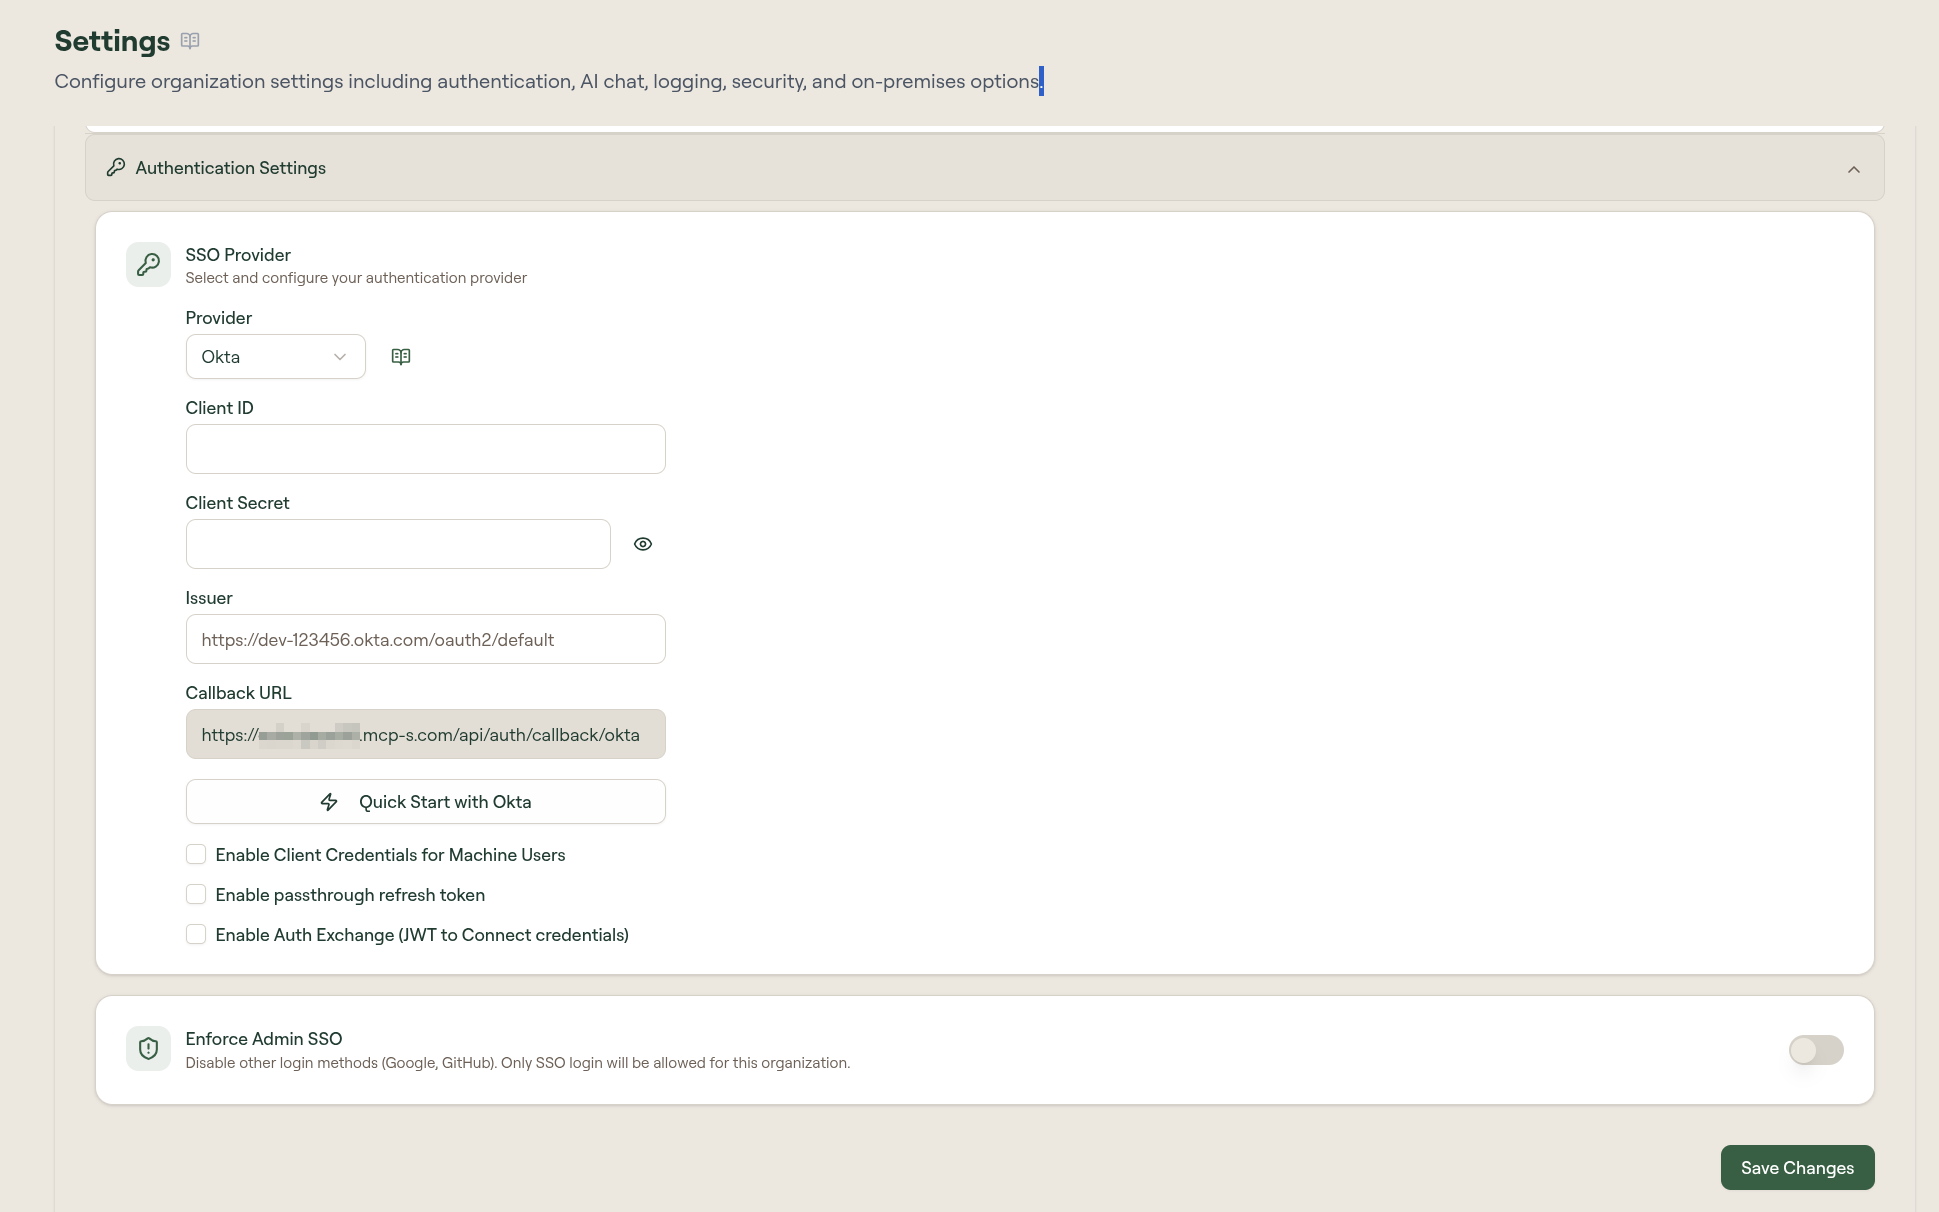
Quick Start with Okta
After saving your credentials, select Quick Start with Okta to launch the Okta Quickstart flow. Enter your Okta API Token and select Verify & Continue. This syncs your Okta users, groups, and apps with Willow automatically without manual SCIM configuration.

Advanced options
After saving, three optional settings are available beneath the credential fields:
Enable Client Credentials for Machine Users: allows machine users to authenticate using OAuth client credentials. When enabled, a Token Endpoint field appears, auto-discovered from your issuer's .well-known/openid-configuration.

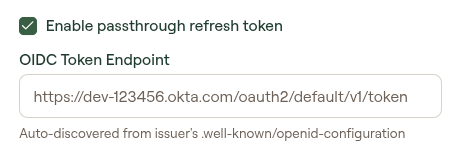
Enable passthrough refresh token: forwards the user's SSO JWT to internal MCP servers automatically. When enabled, an OIDC Token Endpoint field appears, auto-discovered. See JWT Passthrough for the full setup.
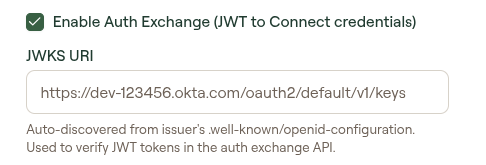
Enable Auth Exchange (JWT to Connect credentials): enables JWT token verification using your IdP's JWKS endpoint. When enabled, a JWKS URI field appears, auto-discovered. Used to verify JWT tokens in the auth exchange API.
Assign users or groups
In the Okta Admin Console, open the Willow app → Assignments tab → Assign → select users or groups.
After SSO is working, configure SCIM provisioning to automate user and group lifecycle management between Okta and Willow. When SCIM is active, Okta creates, updates, and deprovisions users and groups automatically. See SCIM Provisioning with Okta for step-by-step instructions.