Add an MCP Server
Use this guide when you need to add a specific MCP server to your organization. For a full first-time walkthrough that also covers groups, publishing, and client connection, see Add and Configure Your First MCP Server.
Prerequisites
You need:
- admin access to Willow
- a deployed Willow MCP gateway
Add from catalog
The catalog lists pre-built connectors for popular services. When a connector for your target service already exists, adding from the catalog is faster than configuring a custom server — Willow pre-populates the tool list, risk categories, and connection defaults.
- Open Build > MCP Servers.
- Select Add MCP Server.
- Search or filter the connector grid by source, category, auth type, transport, or open-source status.
- Hover over the connector card and select Use.
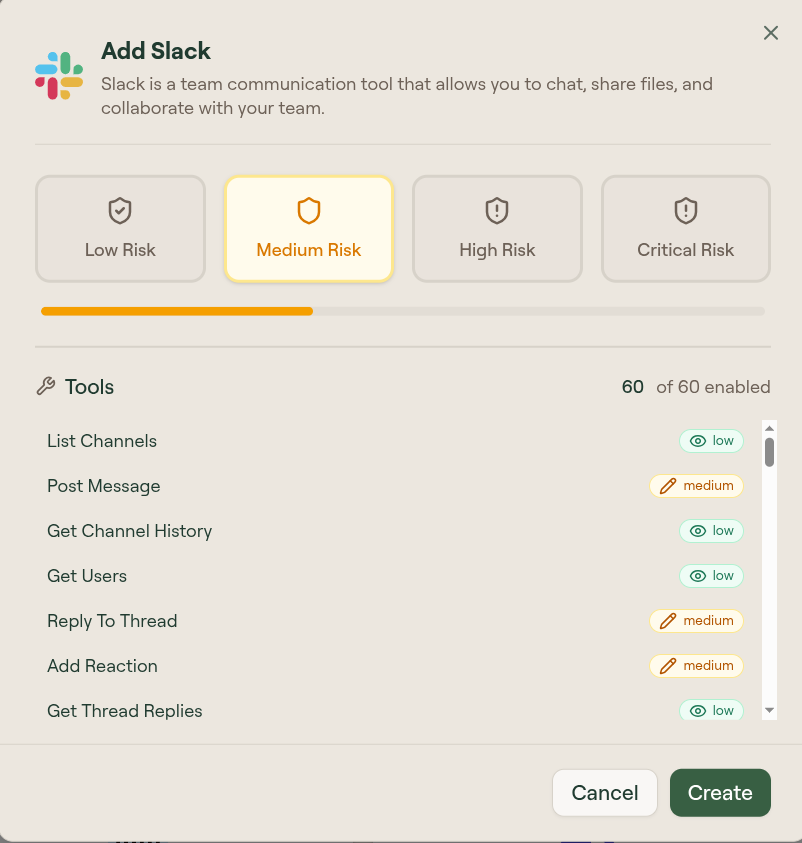
- In the add modal, review the risk level and enabled tools before proceeding.
- Select Create.
The add modal shows which tools the connector exposes and their risk classifications. Deselecting high-risk tools here means they won't be enabled by default — you can change this later from the Tools tab.
After selecting Create, Willow opens the new server's edit page. You can immediately start configuring authentication on the Setup tab and syncing tools on the Tools tab.
For connector-specific credential and OAuth setup, see Connectors.
Add a custom MCP server
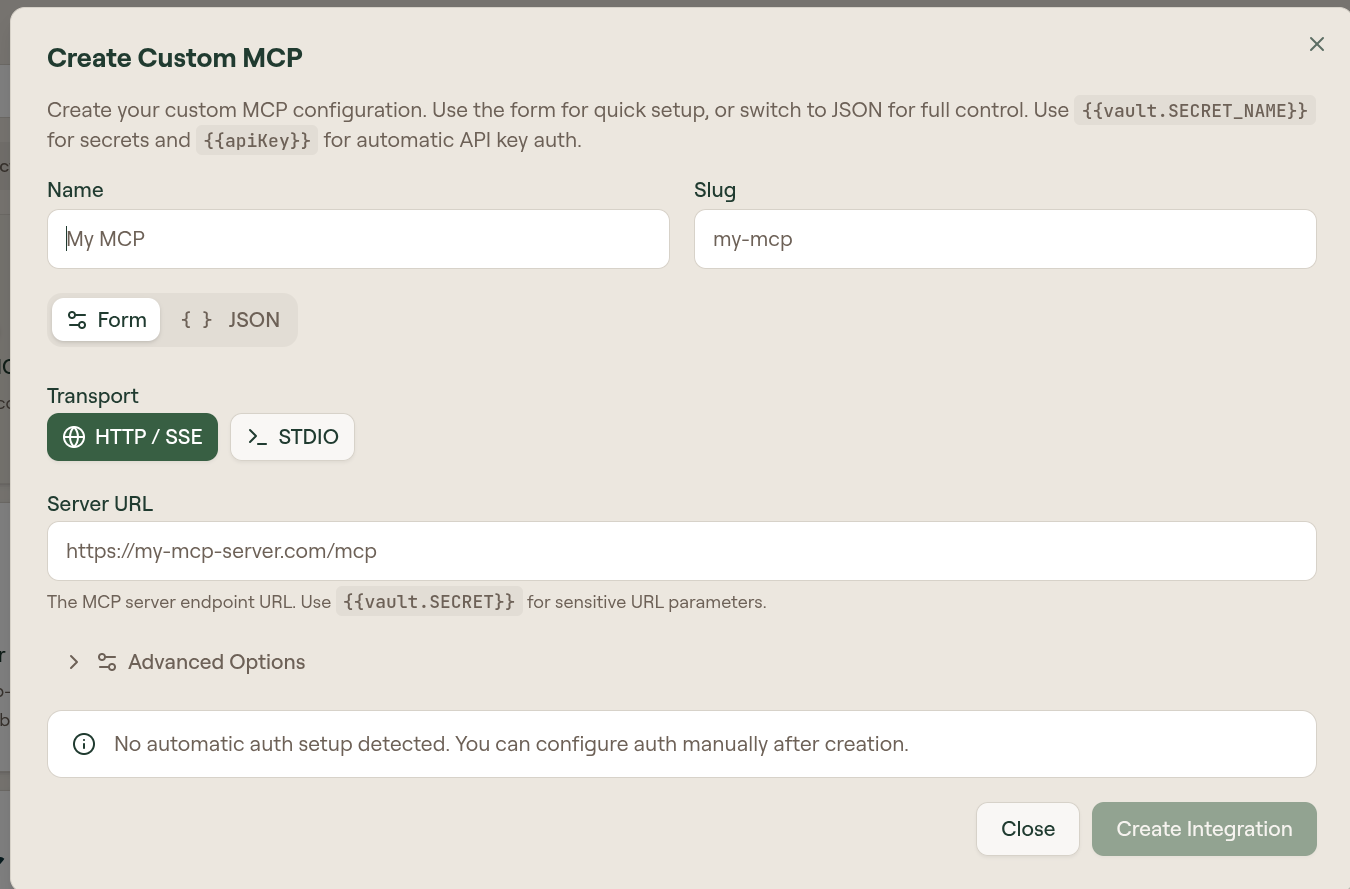
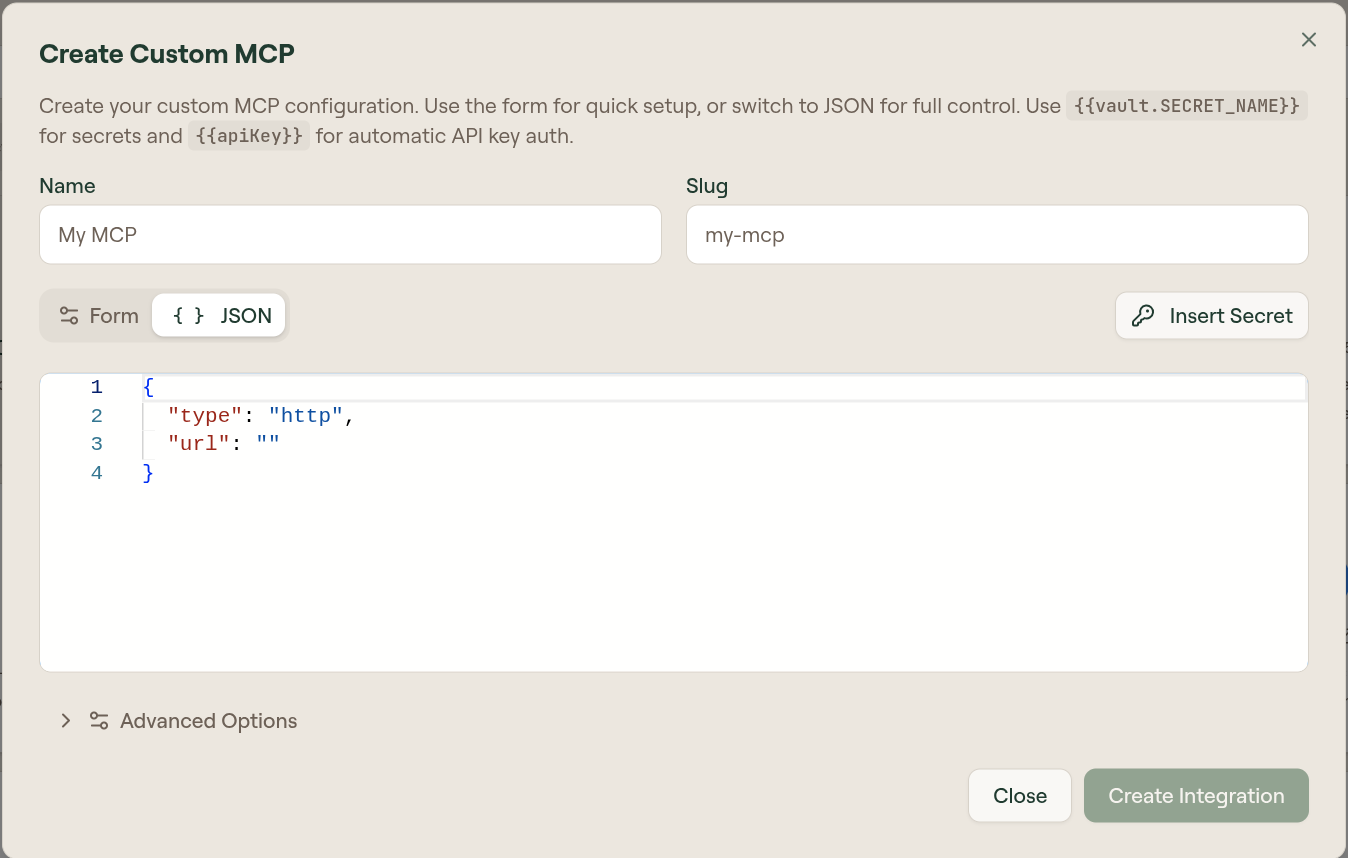
Use this path when you have your own MCP server endpoint or a local command-based server. Custom servers support both HTTP/SSE and STDIO transports, and can be configured in Form mode (guided fields) or JSON mode (full configuration editor).
- On the Add MCP Server page, hover over Custom MCP and select Configure.
- Enter a Name and Slug.
- Choose Form for guided setup or JSON for full configuration control.
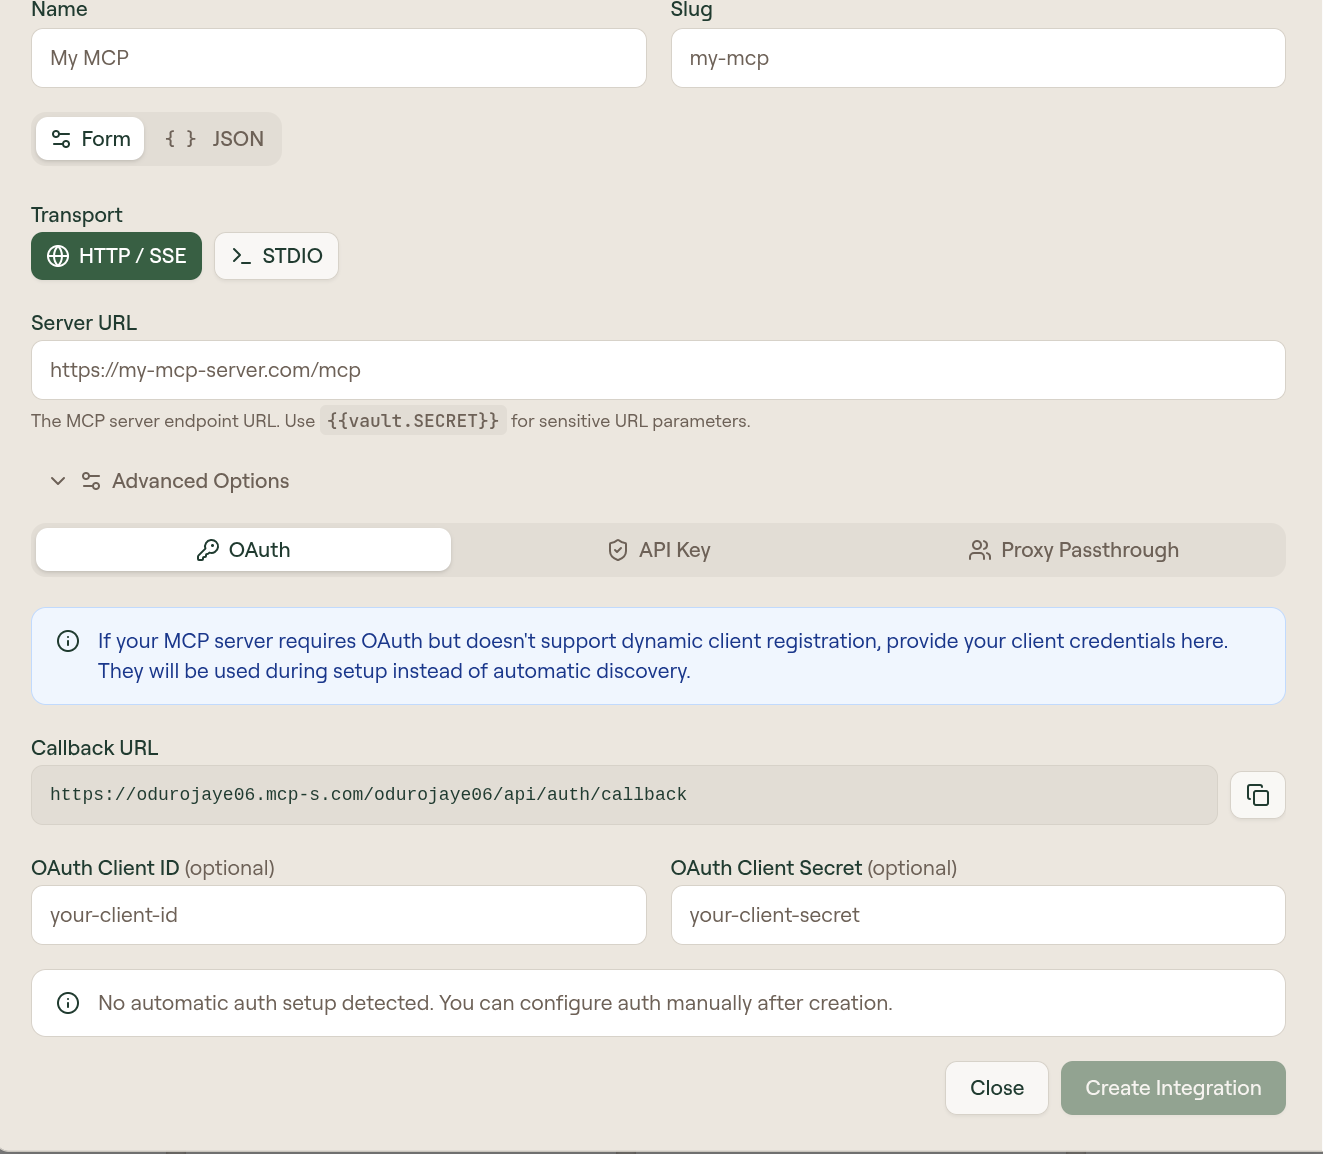
- Select the transport and enter the connection details (see below).
- Expand Advanced Options to configure authentication if the server requires it.
- Select Create Integration.
Transport options
HTTP / SSE — Enter the Server URL. Use {{vault.SECRET_NAME}} for sensitive URL parameters.
STDIO — Selecting STDIO replaces the Server URL field with Command and Arguments (comma-separated) fields. Use this for local process-based servers.
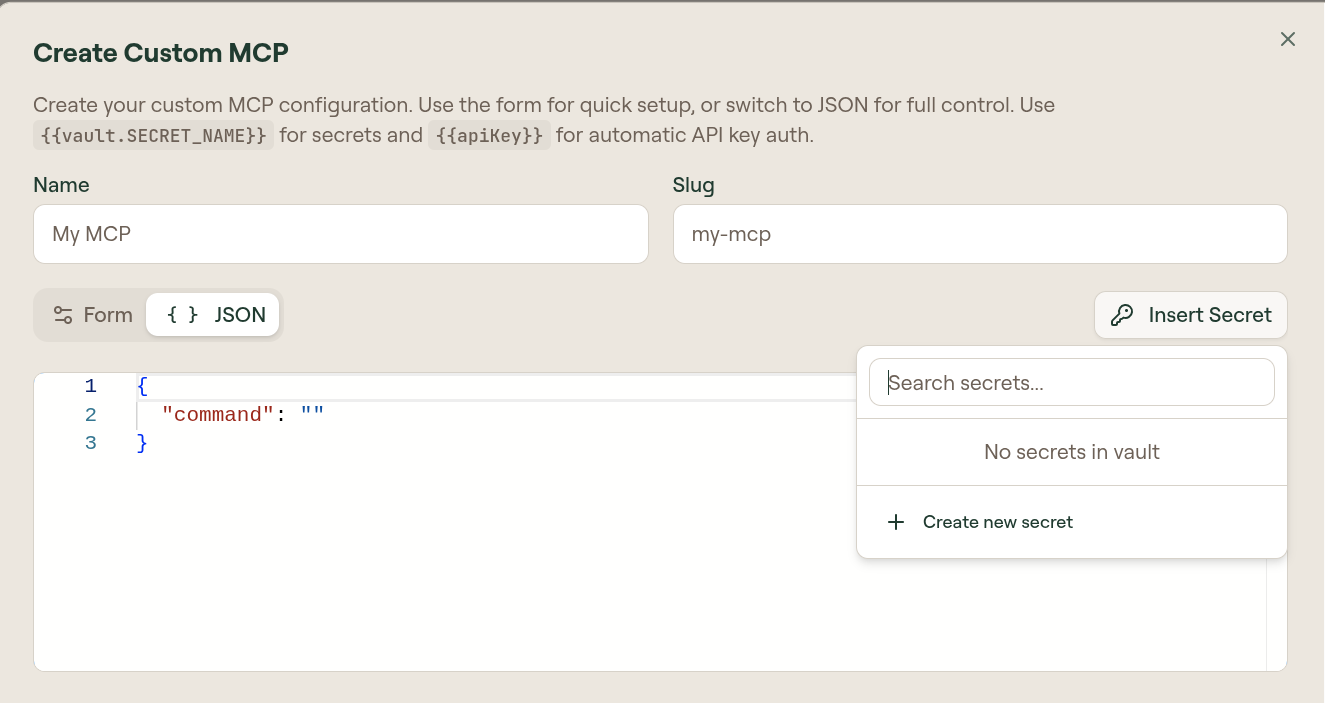
In JSON mode, use the Insert Secret button to reference vault secrets directly in the configuration editor rather than typing {{vault.SECRET_NAME}} by hand.
Authentication in Advanced Options
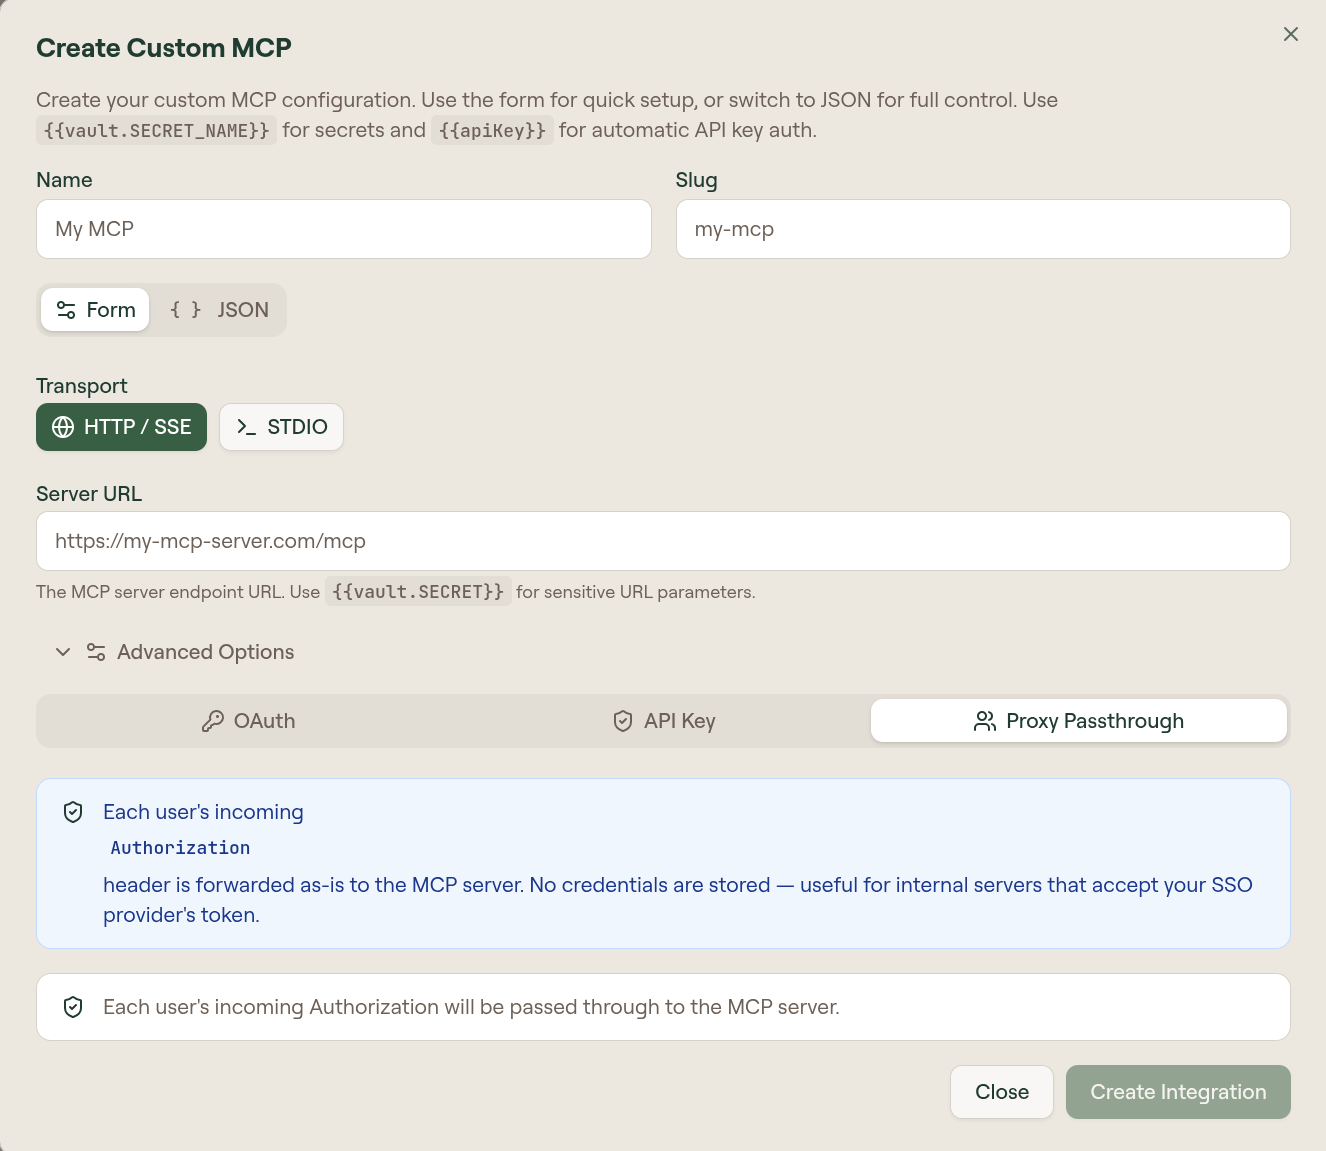
Expand Advanced Options to choose how Willow authenticates requests to your custom server. There are three options.
OAuth — Willow handles the OAuth flow through a pre-filled Callback URL. Provide the OAuth Client ID and OAuth Client Secret from your OAuth application (both are optional if the server accepts public clients). No additional discovery is available in the creation modal — use the Setup tab after creation for full OAuth endpoint configuration.
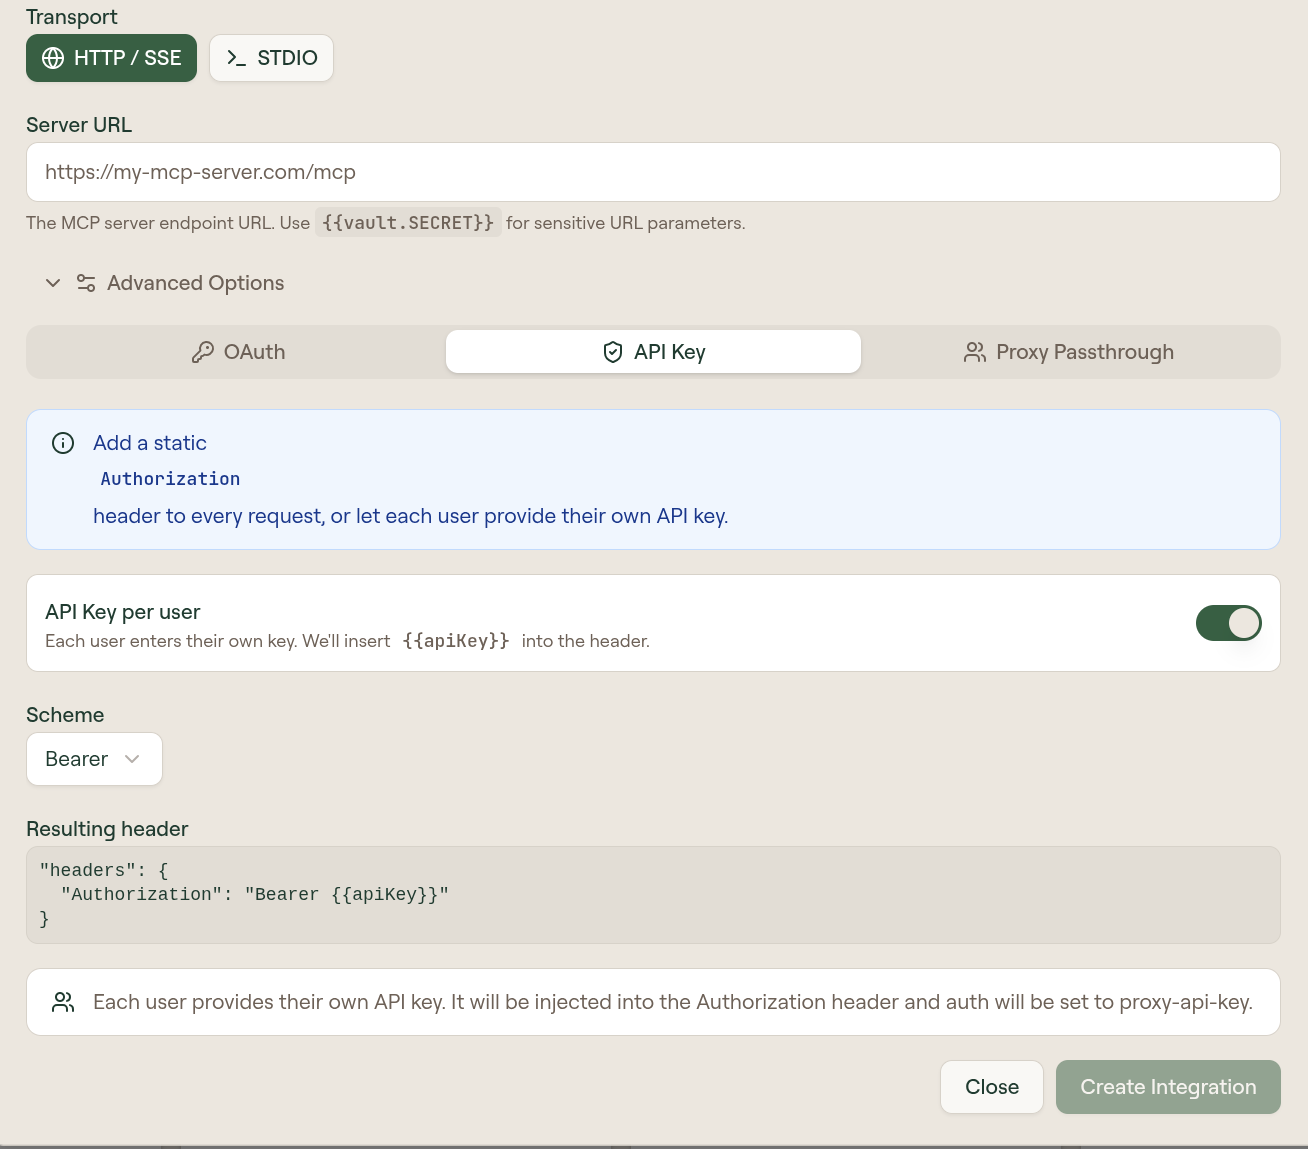
API Key — Add a static Authorization header value, or turn on API Key per user to let each user supply their own key at connection time. The key is injected into the header as {{apiKey}}. Choose a scheme — Bearer, Basic, or Other with a custom prefix — and the resulting header preview updates to show exactly what Willow will send.
Proxy Passthrough — Willow forwards the user's incoming Authorization header as-is to the MCP server, with no credentials stored. Use this when your server already handles authentication and you want users to pass their own tokens through.
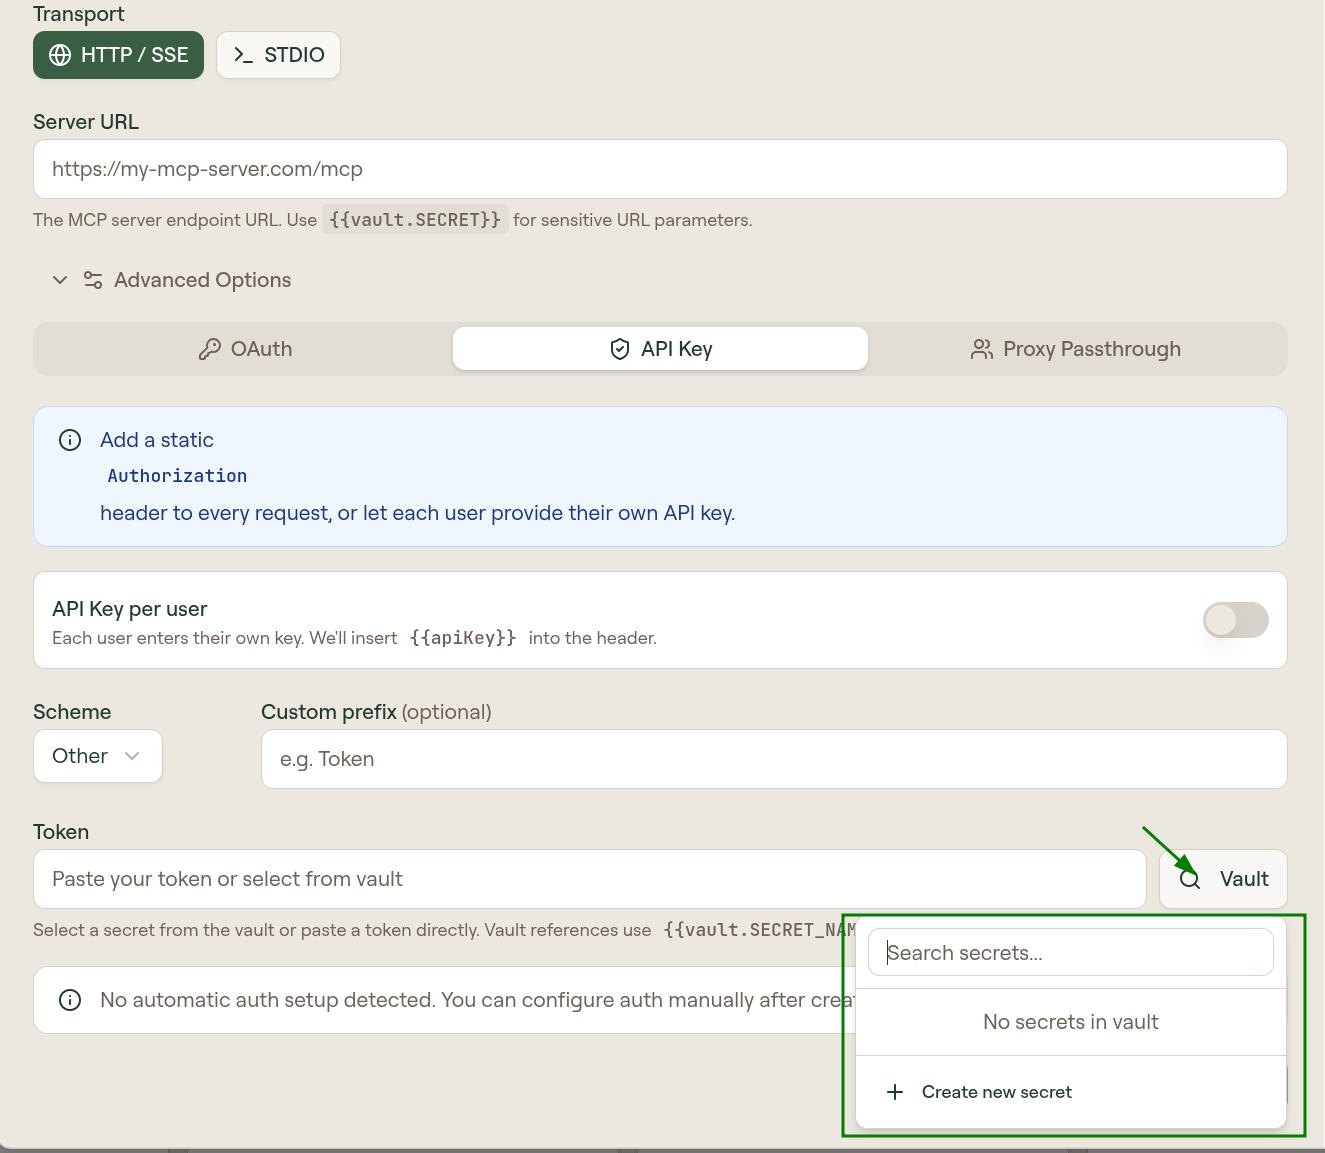
For secrets that belong in vault rather than inlined in the configuration, see Vault.
Add via API
Use the Admin API when you want to automate MCP server creation, for example in infrastructure-as-code pipelines or org-wide provisioning scripts.
Send a POST request to /api/mcp-servers with at least name and mcp_proxy (a JSON string containing the MCP configuration). Optional fields include slug, description, logo_url, and status (active or draft).
If you omit slug, Willow generates one from name. If that slug already exists, a numeric suffix is appended.
See Create MCP Server for the full request schema and examples.
After adding
When creation finishes, Willow opens the server's edit page. New servers start with draft status, meaning they are visible to admins but unreachable through the gateway until published.
From here:
- Open the Setup tab and configure authentication.
- Open the Tools tab and sync and verify tools.
- Review owners, connected groups, and proxy settings in MCP Server Settings Reference.
- Select Publish in the top right of the edit page when the server is ready for users.